--- title: Learn the basics subtitle: Sign up for free and learn the basics of database branching with Neon enableTableOfContents: true redirectFrom: - /docs/quickstart/console/ - /docs/cloud/getting-started/ - /docs/cloud/getting_started/ - /docs/get-started-with-neon/signing-up - /docs/get-started/setting-up-a-project updatedOn: '2025-08-09T09:50:31.819Z' ---

How to view and modify data in the console

Create an isolated database copy per developer

Reset your branch to production when ready to start new work

About branching Branching workflows Connect Neon to your stack
This tutorial walks you through your first steps using Neon as your Postgres database. You'll explore the Neon object hierarchy and learn how database branching can simplify your development workflow. ## About branching Each [branch](/docs/introduction/branching) is a fully-isolated copy of its parent. We suggest creating a long-term branch for each developer on your team to maintain consistent connection strings. You can reset your development branch to production whenever needed. After signing up, you'll start with two branches: - A `production` branch (the default branch) intended for your production workload, configured with a larger compute size (1-4 CU) - A `development` branch (created as a child of production) that you can use for local development, configured with a smaller compute size (0.25-1 CU) You can change these sizes at any time, but these are meant to align with typical usage, where production will need more compute than your less active development branches. ## Sign up
If you're already signed up or coming to Neon from **Azure**, you can skip ahead to [Step 2](/docs/get-started/signing-up#step-2-onboarding-in-the-neon-console). If you haven't signed up yet, you can sign up for free here: [https://console.neon.tech/signup](https://console.neon.tech/signup) Sign up with your email, GitHub, Google, or other partner account. For information about what's included with the Free and paid plans, see [Neon plans](/docs/introduction/plans).
![sign_up](/docs/get-started/sign_up_reduced.png "no-border")
## Onboarding in the Neon Console After you sign up, you are guided through some onboarding steps that ask you to create a **Project**. ![onboarding](/docs/get-started/onboarding.png) 
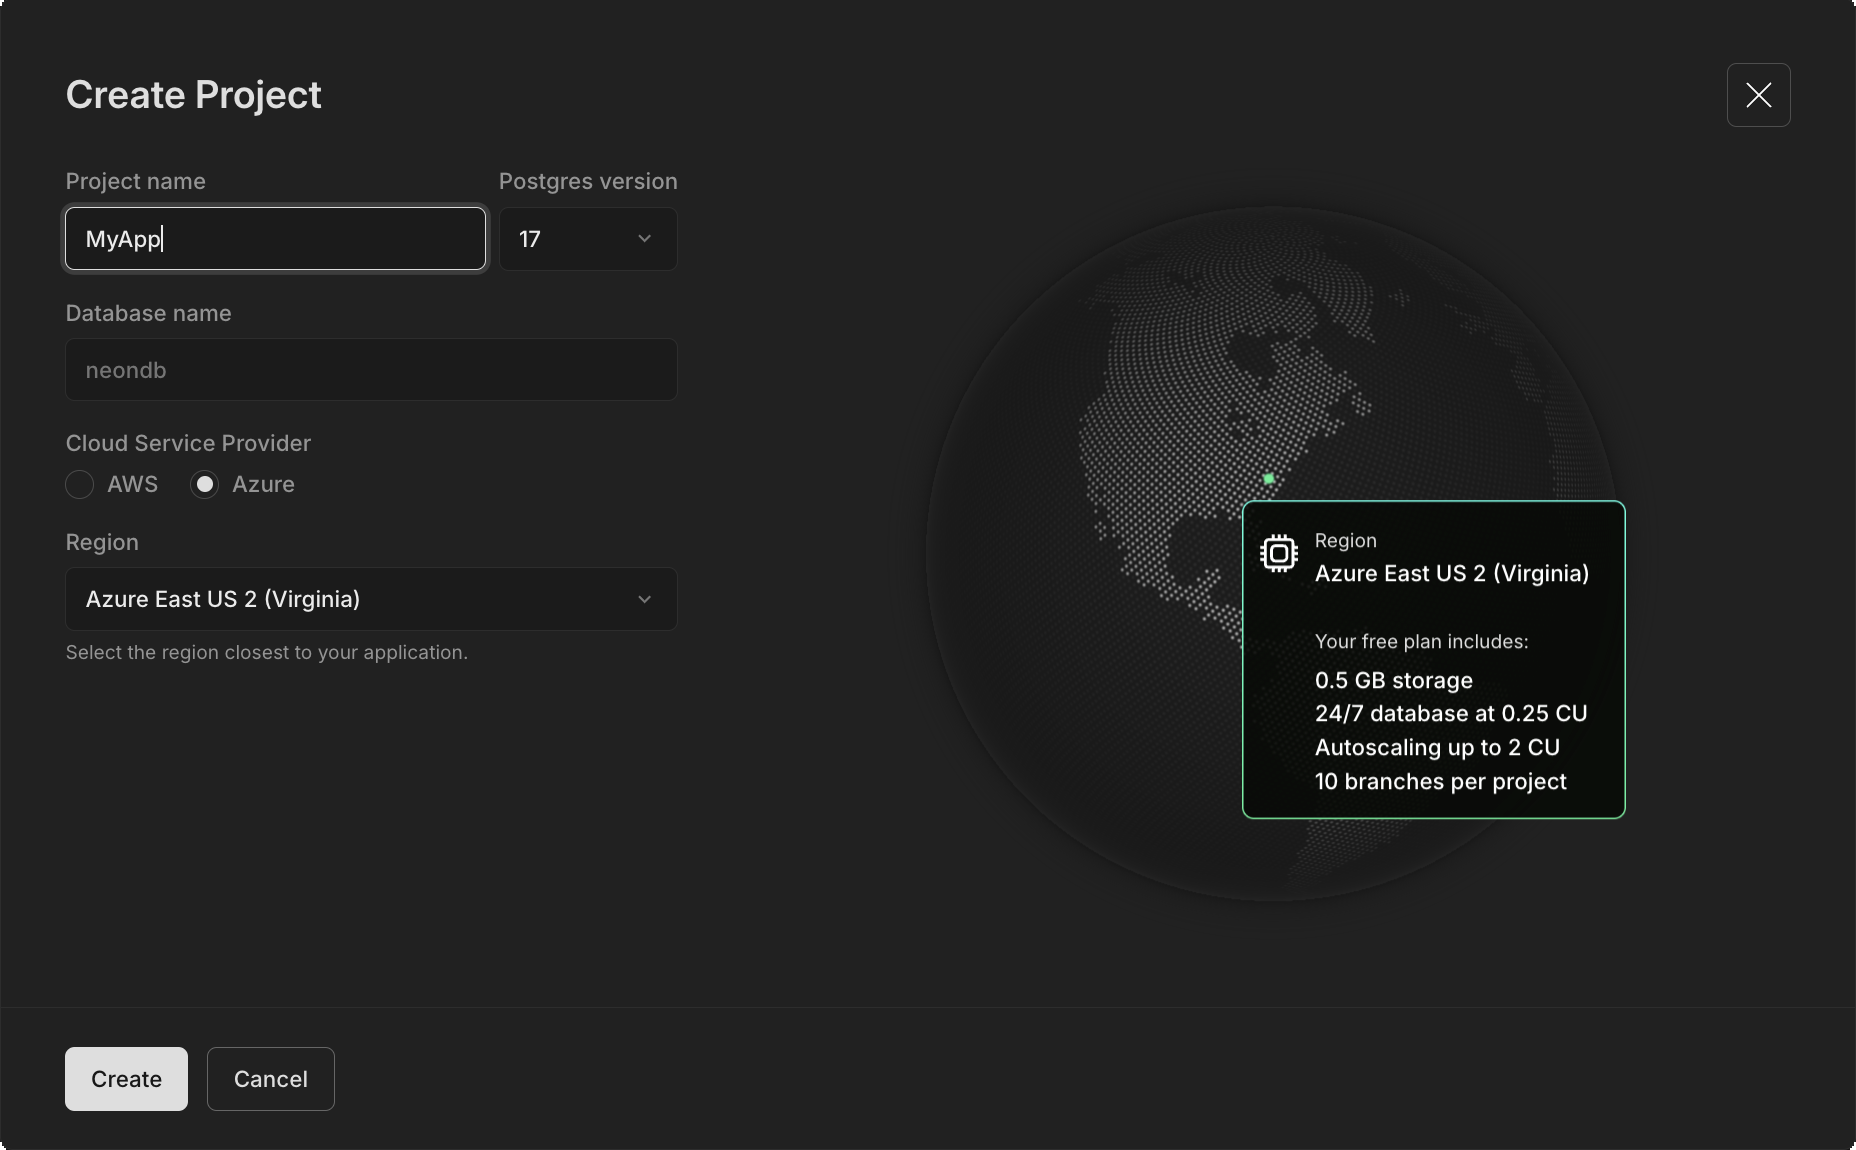
The steps should be self-explanatory, but it's important to understand a few key points: - **In Neon, everything starts with the _Project_** It is the top-level container that holds your branches, databases, and roles. Typically, you should create a project for each repository in your application. This allows you to manage your database branches just like you manage your code branches: a branch for production, staging, development, new features, previews, and so forth. - **We create two branches for you** - `production` is the default (primary) branch and hosts your database, role, and a compute that you can connect your application to - `development` is created as a child branch of production for your development work At this point, if you want to just get started connecting Neon to your toolchain, go to [Day 2 - Connecting Neon to your tools](/docs/get-started/connect-neon). Or if you want a more detailed walkthrough of some of our key console and branching features, let's keep going. ## Add sample data Let's get familiar with the **SQL Editor**, where you can run queries against your databases directly from the Neon Console, as well as access more advanced features like [Time Travel](/docs/guides/time-travel-assist) and [Explain and Analyze](/docs/get-started/query-with-neon-sql-editor#explain-and-analyze). From the Neon Console, use the sidebar navigation to open the **SQL Editor** page. Notice that your default branch `production` is already selected, along with the database created during onboarding, `neondb`. ![Neon SQL Editor](/docs/get-started/sql_editor.png) 
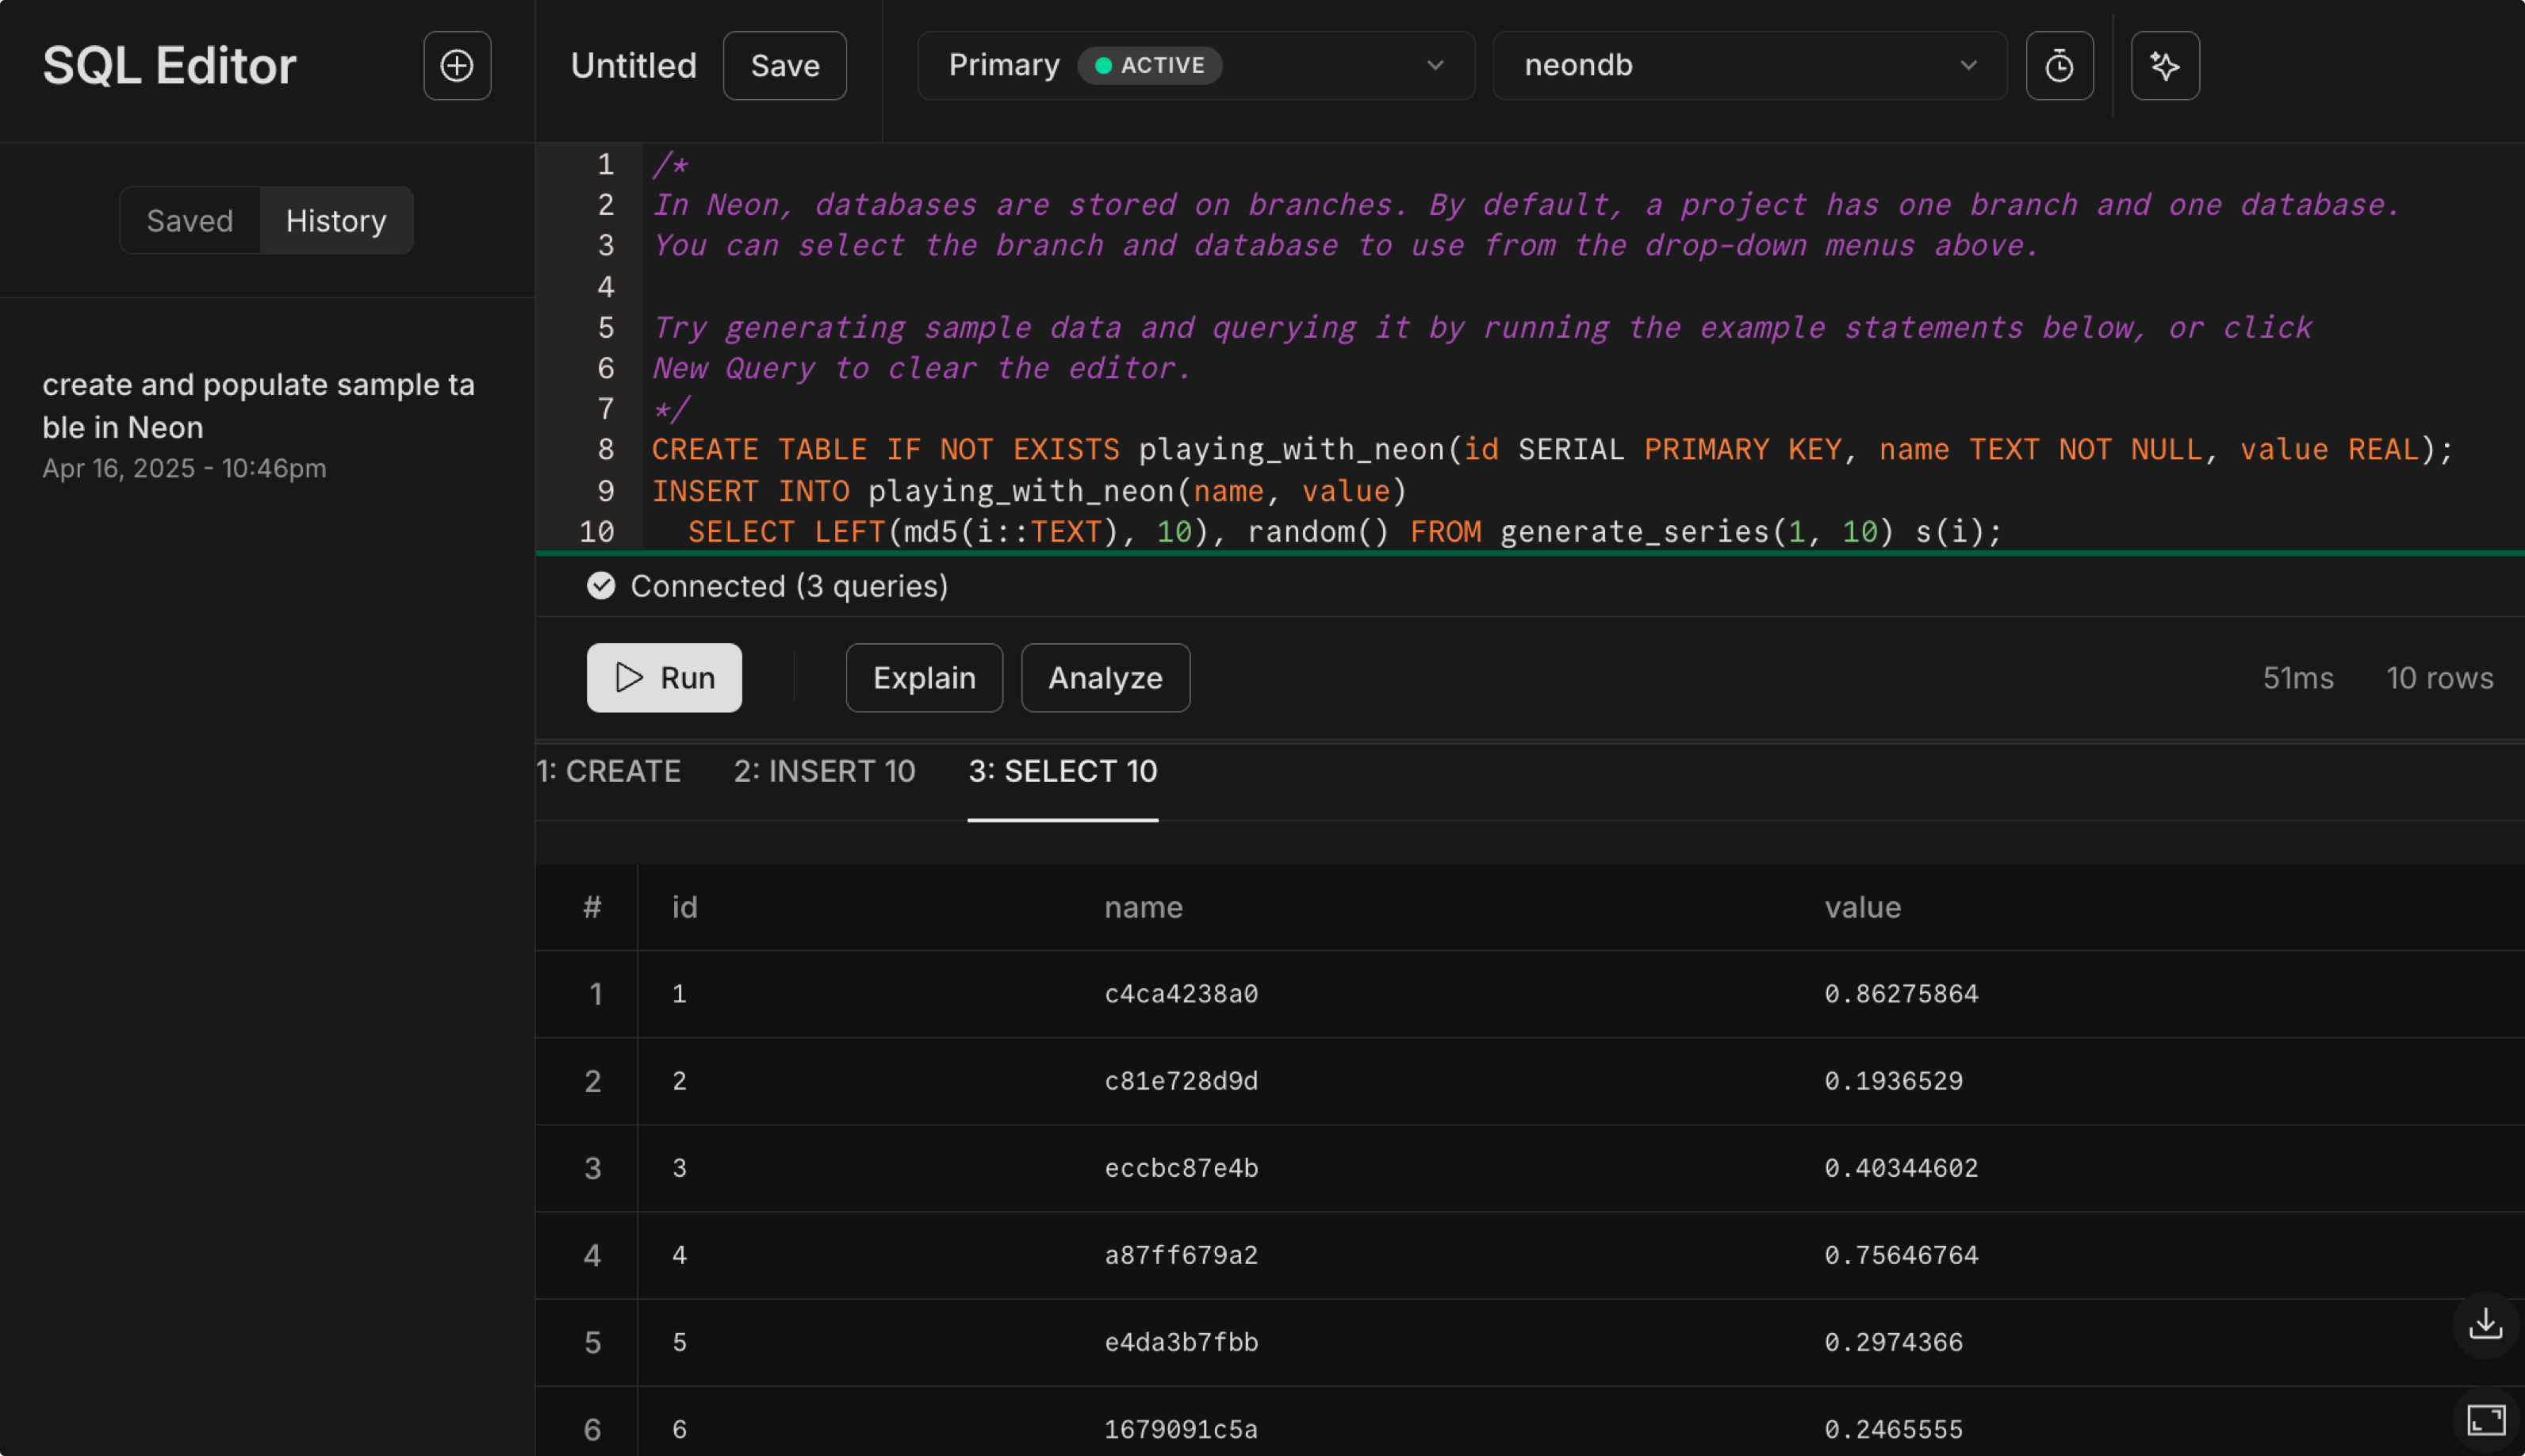
The first time you open the SQL Editor for a new project, the editor includes placeholder SQL commands to create and populate a new sample table called `playing_with_neon`. For this tutorial, go ahead and create this sample table: click **Run**. Every query you run in the SQL Editor is automatically saved with an AI-generated description, making it easy to find and reference your work later. For example, the sample table creation above will be saved with a description like "create and populate sample table in Neon". You can view your query history anytime by clicking the **History** button in the SQL Editor. Or if you want to add the table from the command line and you already have `psql` installed: ```sql shouldWrap CREATE TABLE IF NOT EXISTS playing_with_neon(id SERIAL PRIMARY KEY, name TEXT NOT NULL, value REAL); INSERT INTO playing_with_neon(name, value) SELECT LEFT(md5(i::TEXT), 10), random() FROM generate_series(1, 10) s(i); ``` Your default branch `production` now has a table with some data. ## Try the AI Assistant 
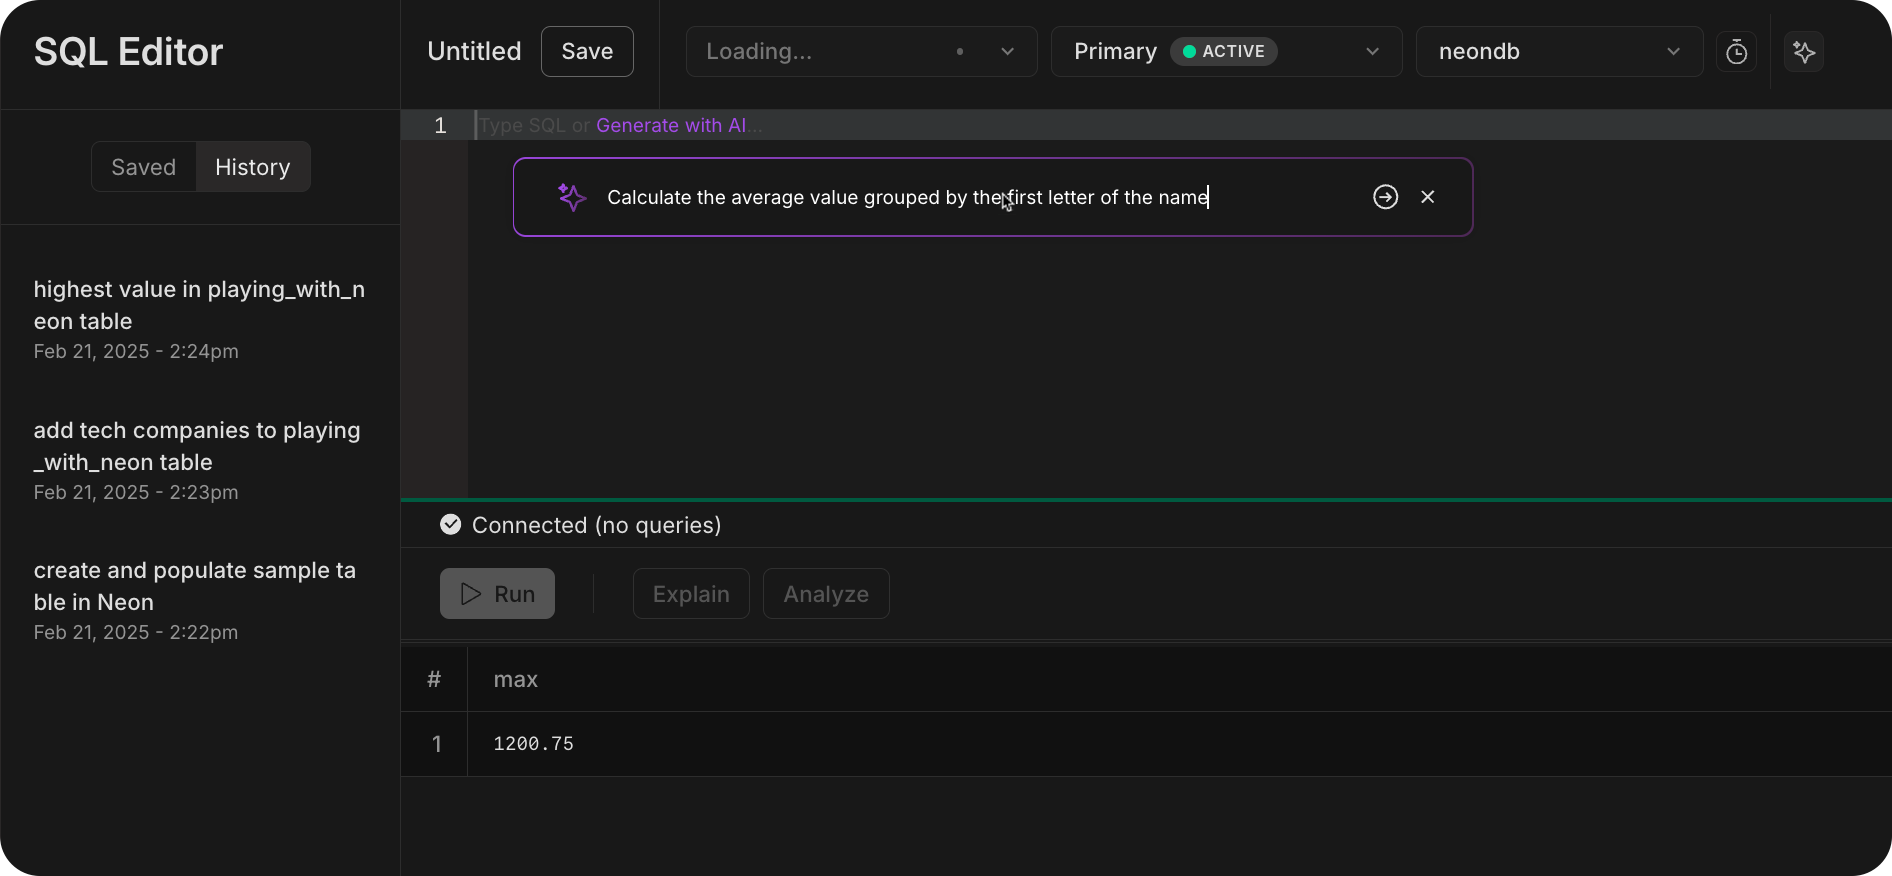
Now that you have some sample data, let's explore how the AI Assistant can help you write SQL queries using natural language prompts. From the SQL Editor, click the **AI Assistant** button in the top-right corner and try a few prompts: - _Add three more rows to the playing_with_neon table with tech company names_ - _Show me the highest value in the table_ - _Calculate the average value grouped by the first letter of the name_ ![Neon SQL Editor AI Assistant](/docs/get-started/sql_assistant.png) Each query you run is automatically saved with an AI-generated description, making it easy to find and reuse queries later. For example, when you ask the AI Assistant to add company data, you should see a response like: ```sql -- Text to SQL original prompt: -- Add three more rows to the playing_with_neon table with tech company names 
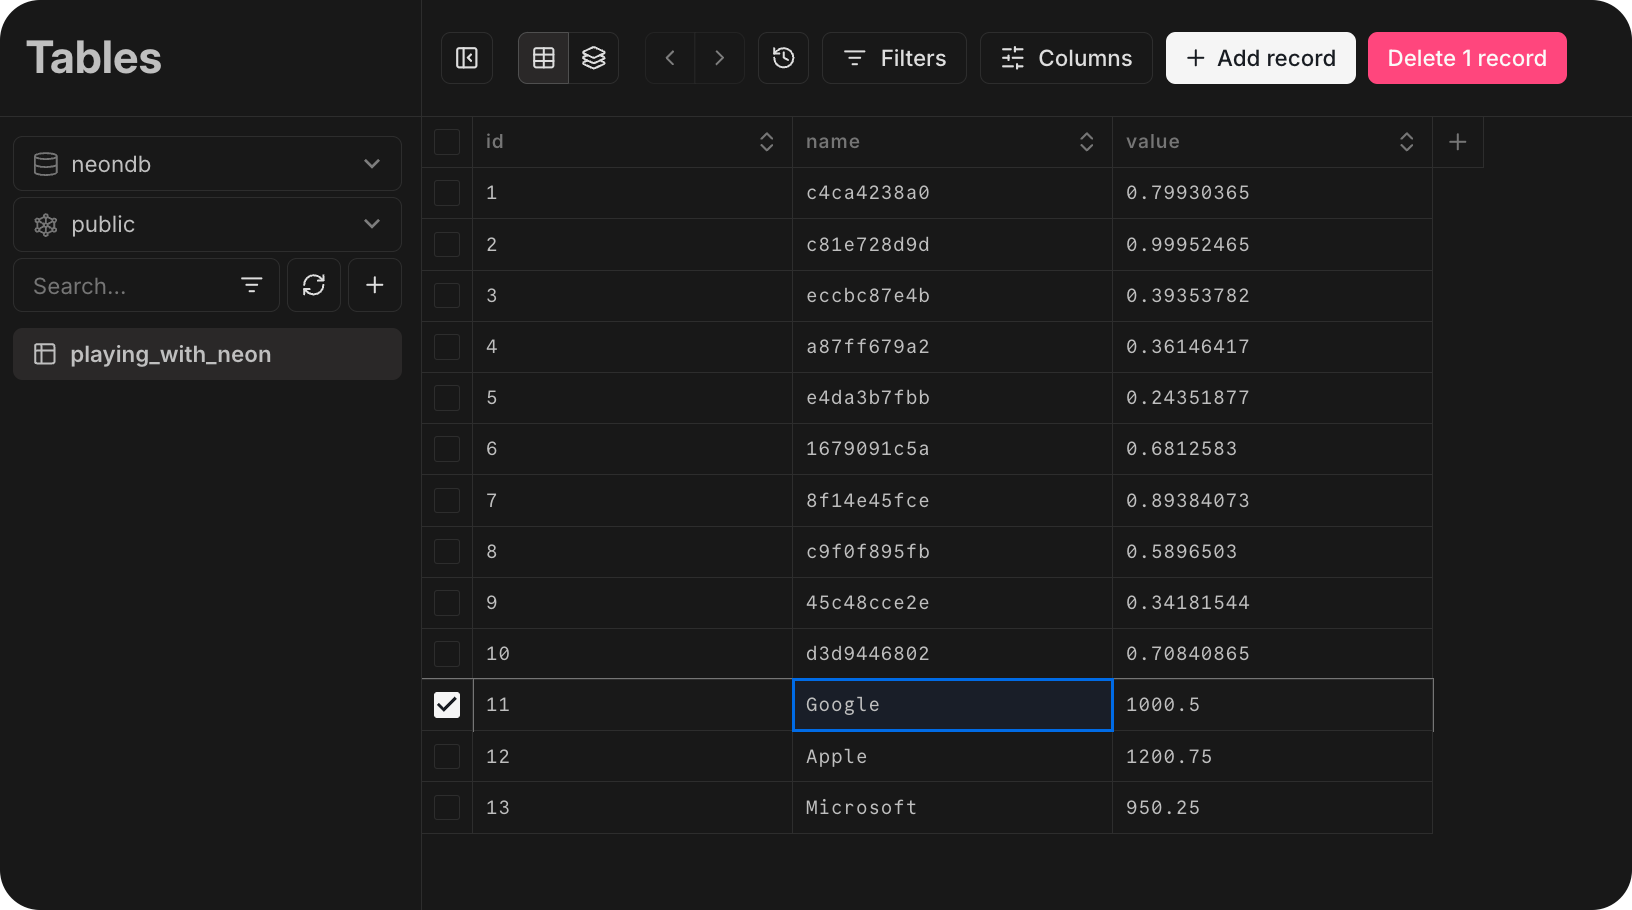
INSERT INTO public.playing_with_neon (name, value) VALUES ('Google', 1000.5), ('Apple', 1200.75), ('Microsoft', 950.25); ``` With the description: "Add tech companies to playing_with_neon table" Learn more about AI features in the [SQL Editor documentation](/docs/get-started/query-with-neon-sql-editor#ai-features). ## View and modify data in the console Now that you have some data to play with, let's take a look at it on the **Tables** page in the Neon Console. The **Tables** page, powered by [Drizzle Studio](https://orm.drizzle.team/drizzle-studio/overview), provides a visual interface for exploring and modifying data directly from the console. The integration with Drizzle Studio provides the ability to add, update, and delete records, filter data, add or remove columns, drop or truncate tables, and export data in `.json` and `.csv` formats. ![Tables page Drizzle integration](/docs/get-started/tables_drizzle.png) For a detailed guide on how to interact with your data using the **Tables** page, visit [Managing your data with interactive tables](/docs/guides/tables). ## Working with your development branch Your project comes with a `development` branch that's an isolated copy of your `production` branch. Let's learn how to use the Neon CLI to manage branches and make some schema changes in your development environment. 1. **Install CLI with Brew or NPM** Depending on your system, you can install the Neon CLI using either Homebrew (for macOS) or NPM (for other platforms). - For macOS using Homebrew: ```bash brew install neonctl ``` - Using NPM (applicable for all platforms that support Node.js): ```bash npm install -g neonctl ``` 2. **Authenticate with Neon** The `neon auth` command launches a browser window where you can authorize the Neon CLI to access your Neon account. ```bash neon auth ``` ![neon auth](/docs/get-started/neonctl_auth.png 'no-border') 3. **View your branches** ```bash neon branches list ``` This command shows your existing branches, including the `production` and `development` branches. ## Make some sample schema changes First, let's make sure our development branch is in sync with production. This ensures we're starting from the same baseline: ```bash neon branches reset development --parent ``` Now that our development branch matches production, we can make some changes. The `playing_with_neon` table from production is now available in your `development` branch, and we'll modify its schema and add new data to demonstrate how branches can diverge. You can use the [Neon SQL Editor](/docs/get-started/query-with-neon-sql-editor) for this, but let's demonstrate how to connect and modify your database from the terminal using `psql`. If you don't have `psql` installed already, follow these steps to get set up: ```bash brew install libpq echo 'export PATH="/opt/homebrew/opt/libpq/bin:$PATH"' >> ~/.zshrc source ~/.zshrc ``` ```bash sudo apt update sudo apt install postgresql-client ``` Download and install PostgreSQL from: https://www.postgresql.org/download/windows/ Ensure psql is included in the installation. With `psql` available, let's work from the terminal to connect to your `development` branch's database and make changes. 1. **Connect to your database** Get the connection string to your branch and connect to it directly via `psql`: ```bash shouldWrap neon connection-string development --database-name neondb --psql ``` This command establishes the psql terminal connection to the `neondb` database on your development branch. 1. **Modify the schema** Add a new column `description` and index it: ```sql shouldWrap ALTER TABLE playing_with_neon ADD COLUMN description TEXT; CREATE INDEX idx_playing_with_neon_description ON playing_with_neon (description); ``` 1. **Insert new data** Add new data that will be exclusive to the dev branch. ```sql shouldWrap INSERT INTO playing_with_neon (name, description) VALUES ('Your dev branch', 'Exploring schema changes in the dev branch'); ``` 1. **Verify the schema changes** Query the table to verify your schema changes: ```sql SELECT * FROM playing_with_neon; ``` Your response should include the new description column and a new row where name = `Your dev branch` and description = `Exploring schema changes in the dev branch`: ```sql {1,13} id | name | value | description ----+--------------------+-------------+-------------------------------------------- 1 | c4ca4238a0 | 0.5315024 | 2 | c81e728d9d | 0.17189825 | 3 | eccbc87e4b | 0.21428405 | 4 | a87ff679a2 | 0.9721639 | 5 | e4da3b7fbb | 0.8649301 | 6 | 1679091c5a | 0.48413596 | 7 | 8f14e45fce | 0.82630277 | 8 | c9f0f895fb | 0.99945337 | 9 | 45c48cce2e | 0.054623786 | 10 | d3d9446802 | 0.36634886 | 11 | Your dev branch | | Exploring schema changes in the dev branch (11 rows) ``` ## Check your changes with Schema Diff After making the schema changes to your development branch, you can use the [Schema Diff](/docs/guides/schema-diff) feature to compare your branch against its parent branch. Schema Diff is a GitHub-style code-comparison tool used to visualize differences between different branch's databases. For this tutorial, Schema Diff helps with validating isolation: it confirms that schema changes made in your isolated development branch remain separate from the production branch. From the **Branches** page in the Neon Console: 1. Open the detailed view for your `development` branch and click **Open schema diff**. 2. Verify the right branches are selected and click **Compare**. You can see the schema changes we added to our development branch highlighted in green. ![Schema diff from branches page](/docs/get-started/getting_started_schema_diff.png) ### Schema Migrations A more typical scenario for Schema Diff is when preparing for schema migrations. While Neon does not provide built-in schema migration tools, you can use ORMs like [Drizzle](https://drizzle.team/) or [Prisma](https://www.prisma.io/) to handle schema migrations efficiently. Read more about using Neon in your development workflow in [Connect Neon to your stack](/docs/get-started/connect-neon). ## Reset your development branch to production After experimenting with changes in your development branch, let's now reset the branch to `production`, its parent branch. [Branch reset](/docs/guides/reset-from-parent) functions much like a `git reset –hard parent` in traditional Git workflows. Resetting your development branches to your production branch ensures that all changes are discarded, and your branch reflects the latest stable state of `production`. This is key to maintaining a clean slate for new development tasks and is one of the core advantages of Neon's branching capabilities. You can reset to parent from the **Branches** page of the Neon Console, but here we'll use the Neon CLI. Use the following command to reset your `development` branch to the state of the `production` branch: Example: ```bash neon branches reset development --parent ``` If you go back to your **Schema Diff** and compare branches again, you'll see they are now identical: ![schema diff after reset](/docs/get-started/getting_started_schema_diff_reset.png) ### When to reset your branch Depending on your development workflow, you can use branch reset: - **After a feature is completed and merged** Once your changes are merged into `production`, reset the development branch to start on the next feature. - **When you need to abandon changes** If a project direction changes or if experimental changes are no longer needed, resetting the branch quickly reverts to a known good state. - **As part of your CI/CD automation** With the Neon CLI, you can include branch reset as an enforced part of your CI/CD automation, automatically resetting a branch when a feature is closed or started.
Make sure that your development team is always working from the latest schema and data by including branch reset in your workflow. To read more about using branching in your workflows, see [Day 3 - Branching workflows](/docs/get-started/workflow-primer). Neon also supports schema-only branching. [Learn more](/docs/guides/branching-schema-only).