---
title: Self-Host Medusa with Neon
subtitle: Learn how to self-host Medusa using Neon Postgres as your database.
enableTableOfContents: true
updatedOn: '2025-11-09T00:00:00.000Z'
---
[Medusa](https://medusajs.com/) is an open-source headless e-commerce platform that provides a flexible backend for building modern e-commerce applications. It uses Postgres as its primary database to store all product, order, and customer data.
In this guide, you'll learn how to set up and self-host Medusa using [Neon](https://neon.com) as your Postgres database. Neon is a serverless Postgres database platform that offers features like serverless compute, and automated scaling, making it an excellent choice for hosting your Medusa backend.
## Prerequisites
Before you begin, ensure you have the following:
1. **Neon Account:** You'll need a Neon account. If you don't have one, sign up [here](https://console.neon.tech/signup).
2. **Node.js & package manager:** A Node-compatible runtime (Node.js v20+, Bun, or Deno) and a package manager (`npm`, `yarn`, `pnpm`, or `bun`).
> This guide uses Node.js with `npm`, but you can adapt the commands to your preferred runtime and package manager.
## Setting up your Neon database
You'll first need to create a Neon database. Follow these steps:
1. Create a new Neon project from the [Neon Console](https://console.neon.tech). For instructions, see [Create a project](/docs/manage/projects#create-a-project).
When creating your Neon project, choose a region that is geographically close to your Medusa server to minimize latency and improve overall performance of your Medusa application.
2. Navigate to your project dashboard page and copy your database connection string by clicking the **Connect** button.
Use the non-pooled connection string for setup. Medusa needs it to run the initial migrations. After installation you can switch to the pooled version to improve performance.
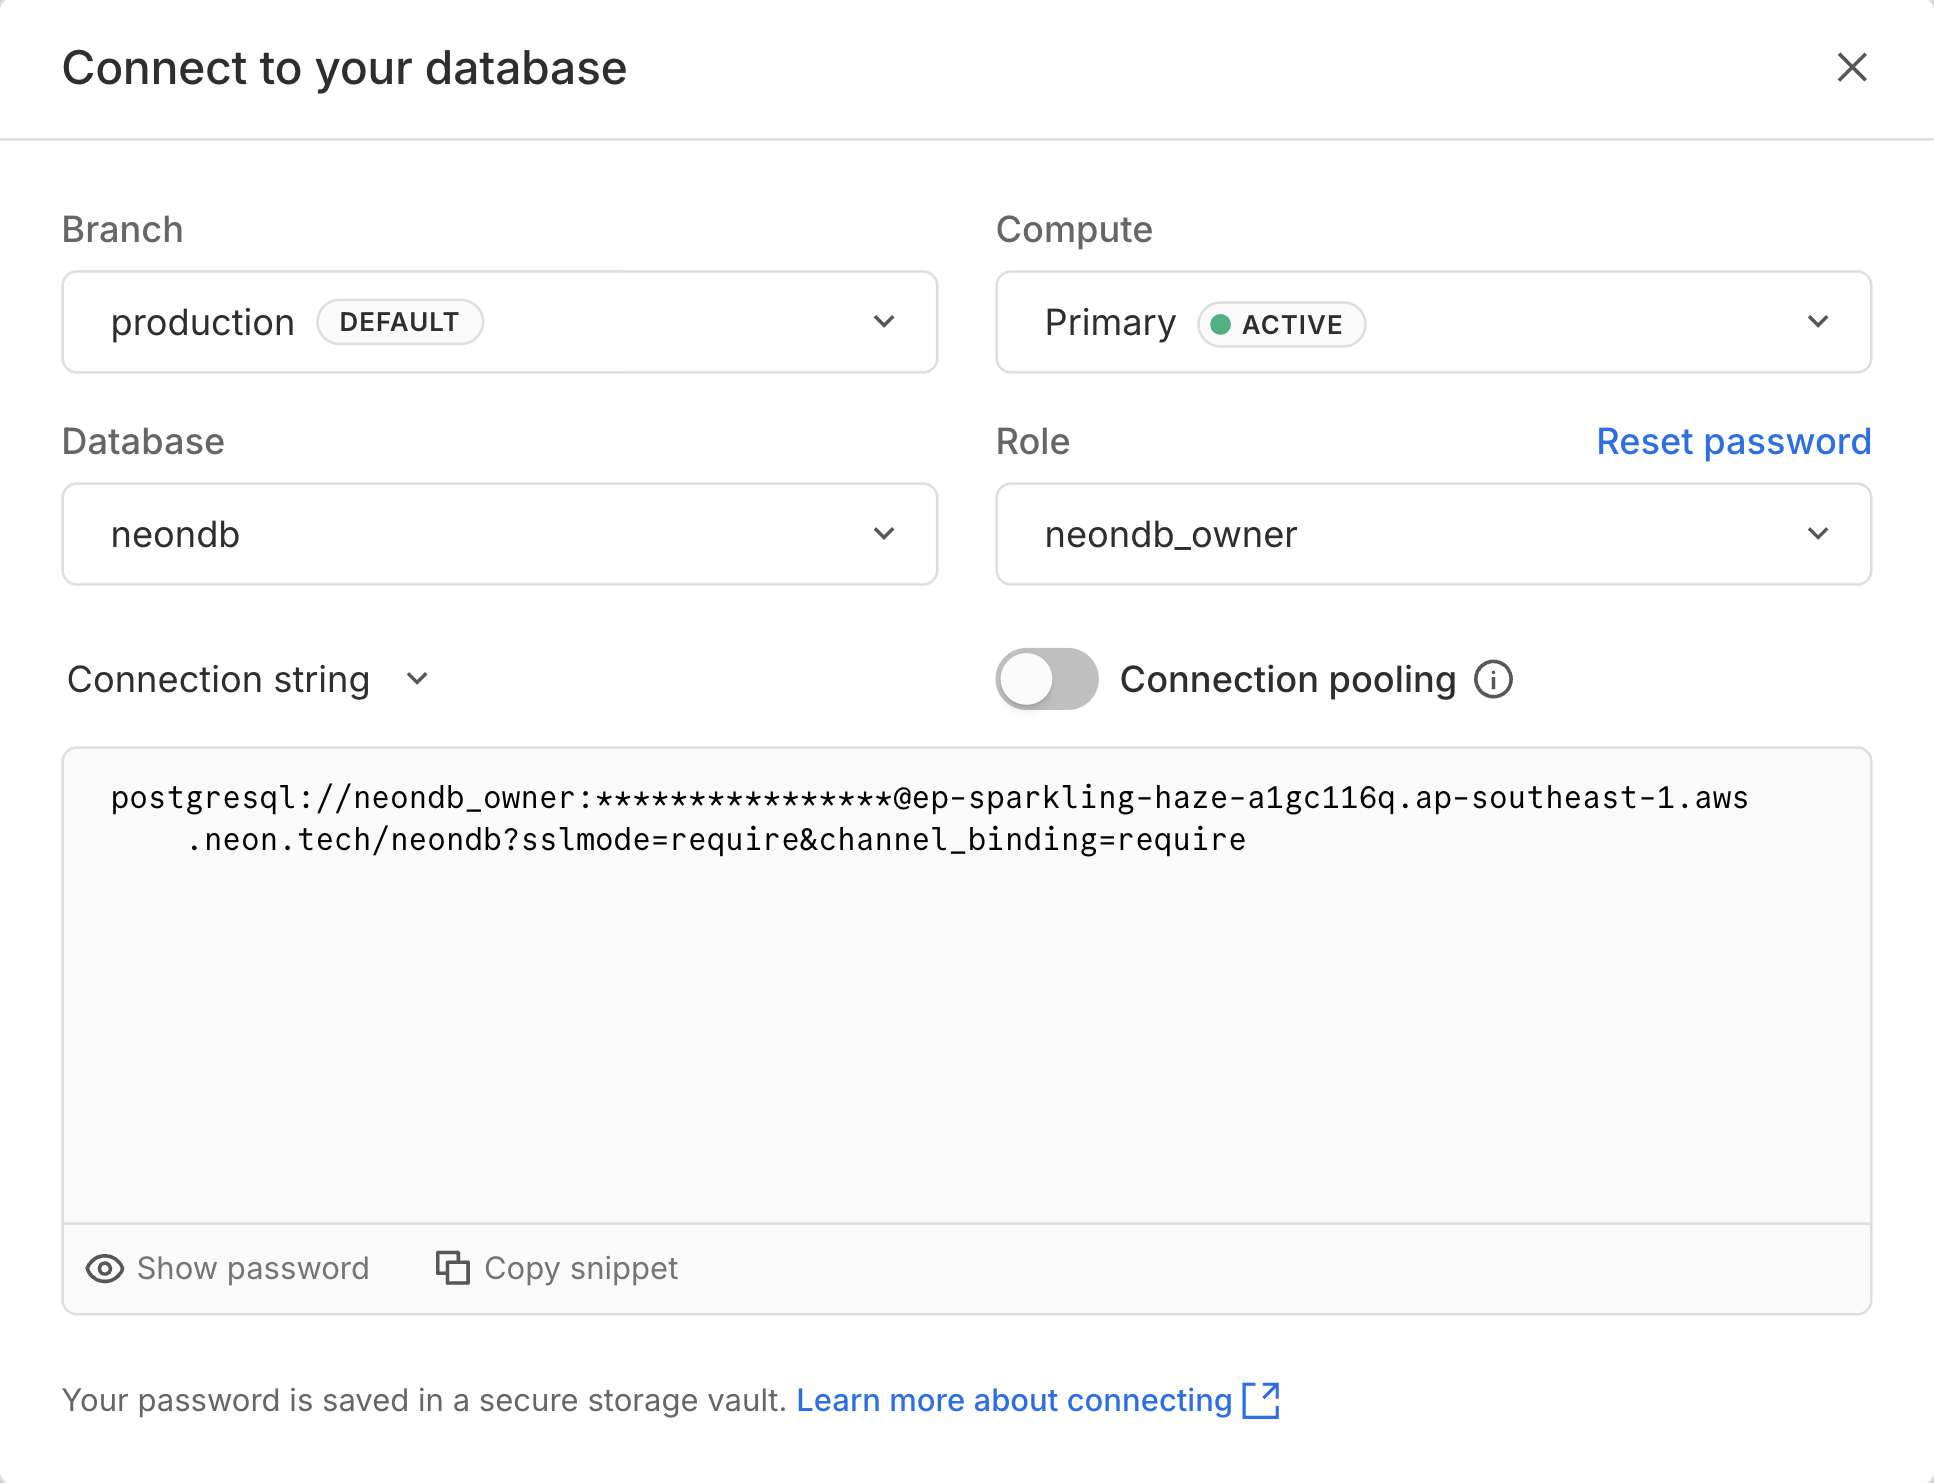
> Choose the **Branch**, **Database**, and **Role** as per your setup
Your connection string will look similar to this:
```text shouldWrap
postgres://[user]:[password]@[neon_hostname]/[dbname]?sslmode=require&channel_binding=require
```
## Initialize the Medusa application
The Medusa CLI tool, `create-medusa-app`, simplifies the process of setting up a new Medusa project. It can automatically configure your Medusa backend to connect to your Neon database, run the necessary migrations, and seed initial data.
### Run the setup command
Execute the following command in your terminal. Replace the example string with the exact connection string you copied from the Neon Console.
```bash shouldWrap
npx create-medusa-app@latest --db-url "YOUR_NEON_CONNECTION_STRING"
```
### Installation steps
1. **Follow the prompts:** The CLI will ask a few questions to configure your setup:
- **Project name:** Enter a name for your project (e.g., `medusa-neon-store`).
- **Frontend starter:** Choose whether to install the Next.js Starter Storefront or skip it depending on your preference.
2. **Automatic setup:**
- The tool will install the Medusa backend and optionally the Next.js Starter Storefront.
- **Crucially**, it will use your Neon connection string to:
- Update the backend's configuration file.
- **Run the initial database migrations** (creating all Medusa tables) on your Neon database.
- **Seed initial data** (sample products, regions, etc.) into your Neon database.
You should see output similar to the following once the setup is complete:
```bash shouldWrap
$ npx create-medusa-app@latest --db-url "YOUR_NEON_CONNECTION_STRING"
? What's the name of your project? my-medusa-store
? Would you like to install the Next.js Starter Storefront? You can also install it later. Yes
🚀 Starting project setup, this may take a few minutes.
✔ Created project directory
✔ Installed Next.js Starter Storefront successfully in the my-medusa-store-storefront directory.
✔ Installed Dependencies
✔ Ran Migrations
✔ Seeded database with demo data
✔ Finished Preparation
✔ Project Prepared
Starting Medusa...
> my-medusa-store@0.0.1 dev
> medusa develop
- Creating server
✔ Server is ready on port: 9000 – 11ms
```
## Create an Admin user
After creating the Medusa application, a browser window should open automatically pointing to the Medusa Admin interface. Create your admin user by filling out the registration form.
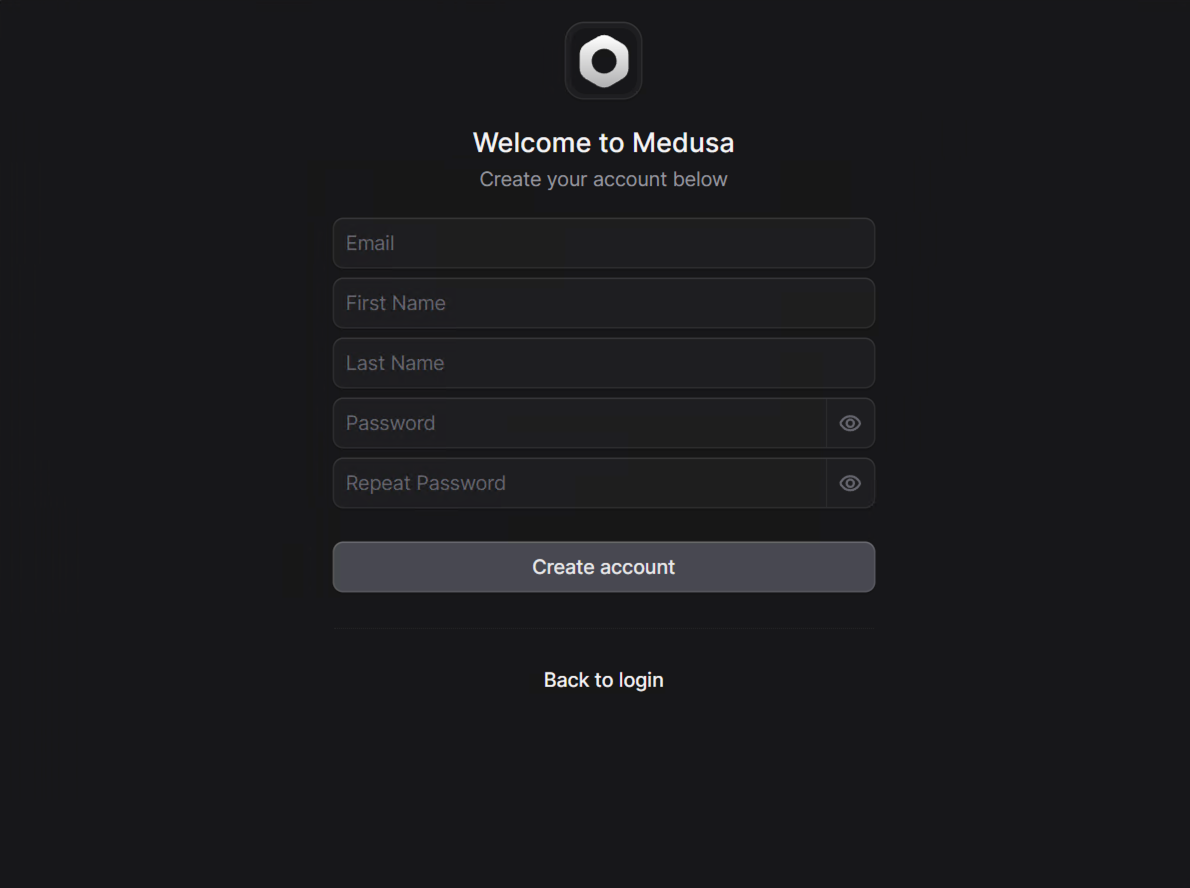
Following successful registration, you will be redirected to the Medusa Admin dashboard where you can manage your store.
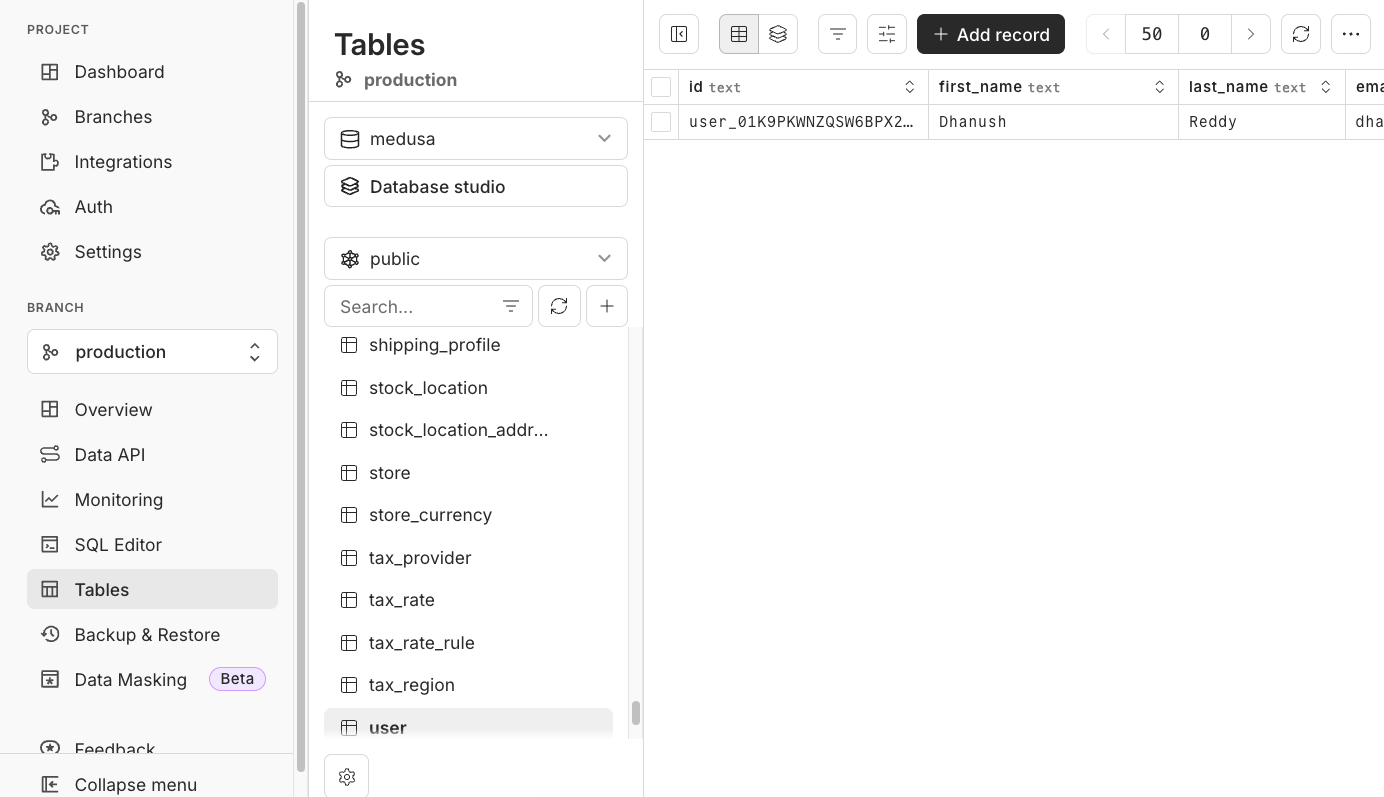
## Verify the connection
After the installation is complete, you can optionally verify the tables in the Neon Console:
1. Navigate to your Neon Project dashboard.
2. Click the **Tables** tab.
3. You should see all the Medusa tables created in your database.
## Running and deploying Medusa
Your Medusa application is now fully configured to use Neon as its database. You can now start the application locally or deploy it to your self-hosted environment.
### Local development
1. Navigate into your new project directory:
```bash
cd medusa-neon-store
```
2. Start the Medusa backend server:
```bash
npm run dev
```
Your Medusa backend should now be running locally and accessible at `http://localhost:9000/app`.
### Deployment to a self-hosted environment
For deployment to a VPS (like DigitalOcean, AWS EC2) or a dedicated platform (like Render, Fly.io), the process is the same as deploying any standard Medusa application. Ensure you configure the database connection to point to your Neon database.
1. Set the `DATABASE_URL` environment variable in your deployment environment to your Neon connection string.
2. Follow the self-hosting deployment instructions in the [Medusa documentation](https://docs.medusajs.com/resources/deployment#self-hosting-medusa) to deploy your Medusa backend and the storefront.
You can optionally enable IP whitelisting in the Neon Console to restrict database access to only your Medusa server's IP address for enhanced security. Learn more: [Neon IP Allow](/docs/introduction/ip-allow)
## Resources
- [Neon Documentation](/docs)
- [Medusa Official Documentation](https://docs.medusajs.com/)
- [Medusa Application Deployment Guide](https://docs.medusajs.com/learn/deployment/general)