> Full Neon documentation index: https://neon.com/docs/llms.txt
# Scale your Laravel application with Lakebase Postgres read replicas
Learn how to scale Laravel applications with Lakebase Postgres read replicas
## Introduction
[Neon read replicas](https://neon.com/docs/introduction/read-replicas) are independent read-only computes. Sending read queries to replicas takes load off your primary compute, which helps read-heavy applications.
In the lakebase architecture, read replicas read from the same storage as the primary compute, so adding one doesn't duplicate your data or add storage costs. You pay only for the replica's compute time.
This guide shows how to use Neon read replicas to scale Laravel applications. You'll configure Laravel's database connections to send reads to a replica, using a simple URL shortener application as the example.
## Prerequisites
- A Neon account and a project. If you don't have one, you can sign up for a Neon account and create a project by following the [Sign up guide](https://neon.com/docs/get-started/signing-up).
- Basic knowledge of [Laravel](https://laravel.com/docs) and PHP
- [Composer](https://getcomposer.org/) installed on your local machine
- [PHP](https://www.php.net/manual/en/install.php) installed on your local machine
## Build the URL shortener app
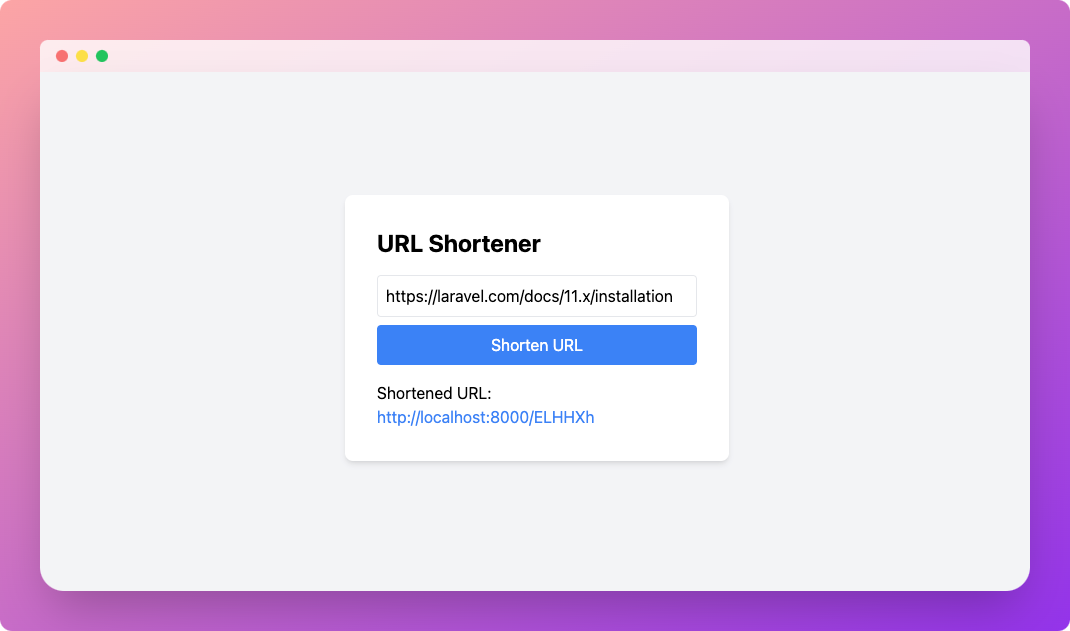
To demonstrate how to use Neon read replicas with Laravel, we'll build a simple URL shortener application that uses a Neon database. We'll then update the application to send read operations to a read replica.
### Part 1: Build the URL shortener app with a single database
#### Set up the project
Create a new Laravel project:
```bash
laravel new url-shortener
┌ Would you like to install a starter kit? ────────────────────┐
│ No starter kit │
└──────────────────────────────────────────────────────────────┘
┌ Which testing framework do you prefer? ──────────────────────┐
│ Pest │
└──────────────────────────────────────────────────────────────┘
┌ Would you like to initialize a Git repository? ────────┐
│ Yes │
└────────────────────────────────────────────────────────┘
┌ Which database will your application use? ────────────┐
│ PostgreSQL │
└───────────────────────────────────────────────────────┘
┌ Default database updated. Would you like to run the default database migrations? ┐
│ No │
└─────────────────────────────────────────────────────────────────────────────────┘
cd url-shortener
```
#### Configure the database connection
Update your `.env` file with your Neon database credentials:
```
DB_CONNECTION=pgsql
DB_HOST=your-neon-host
DB_PORT=5432
DB_DATABASE=your-database-name
DB_USERNAME=your-username
DB_PASSWORD=your-password
```
#### Create the database schema
Create a new migration for the `urls` table:
```bash
php artisan make:migration create_urls_table
```
Edit the migration file in `database/migrations`:
```php
id();
$table->string('original_url');
$table->string('short_code')->unique();
$table->timestamps();
});
}
public function down()
{
Schema::dropIfExists('urls');
}
}
```
Run the migration:
```bash
php artisan migrate
```
**Important:** Neon supports both direct and pooled database connection strings, which you can copy from the **Connect** modal (**Connect** in the Console nav). A pooled connection string connects your application to the database via a PgBouncer connection pool, which supports up to 10,000 client connections per compute. Neon's PgBouncer runs in transaction mode, which doesn't support session-level features such as `SET` and advisory locks that some migration tools rely on. For this reason, use a direct (non-pooled) connection when performing migrations. For more information about direct and pooled connections, see [Connection pooling](https://neon.com/docs/connect/connection-pooling).
#### Create the model
Create a new model for the URL:
```bash
php artisan make:model Url
```
Edit `app/Models/Url.php`:
```php
validate([ 'url' => 'required|url' ]);
$url = Url::create([
'original_url' => $request->url,
'short_code' => Str::random(6),
]);
return response()->json([ 'short_url' => url($url->short_code) ], 201);
}
public function redirect($shortCode)
{
$url = Url::where('short_code', $shortCode)->firstOrFail();
return redirect($url->original_url);
}
}
```
#### Set up the routes
Edit `routes/web.php`:
```php
URL Shortener
```
#### Run the application
Start the Laravel development server:
```bash
php artisan serve
```
Visit `http://localhost:8000` to test the URL shortener app.
### Part 2: Use a read replica for read-only operations
#### Create a read replica on Neon
To create a read replica:
1. In the Neon Console, select your branch from the **BRANCH** selector.
2. Under **Postgres database**, select **Computes**.
3. Click **Add Read Replica**.
4. On the **Add new compute** dialog, select **Read replica** as the **Compute type**.
5. Specify the **Compute size settings** options. You can configure a **Fixed Size** compute with a specific amount of RAM (the default) or enable autoscaling by configuring a minimum and maximum compute size. You can also configure the **Suspend compute after inactivity** setting, which is the amount of idle time after which your read replica compute is automatically suspended. The default setting is 5 minutes.
**Note:** The compute size configuration determines the processing power of your database. More memory means more processing power but also higher compute costs. For information about compute costs, see [Plans](https://neon.com/docs/introduction/plans#compute).
6. When you finish making selections, click **Create**.
Your read replica compute is provisioned and appears on the **Computes** tab under **Postgres database**.
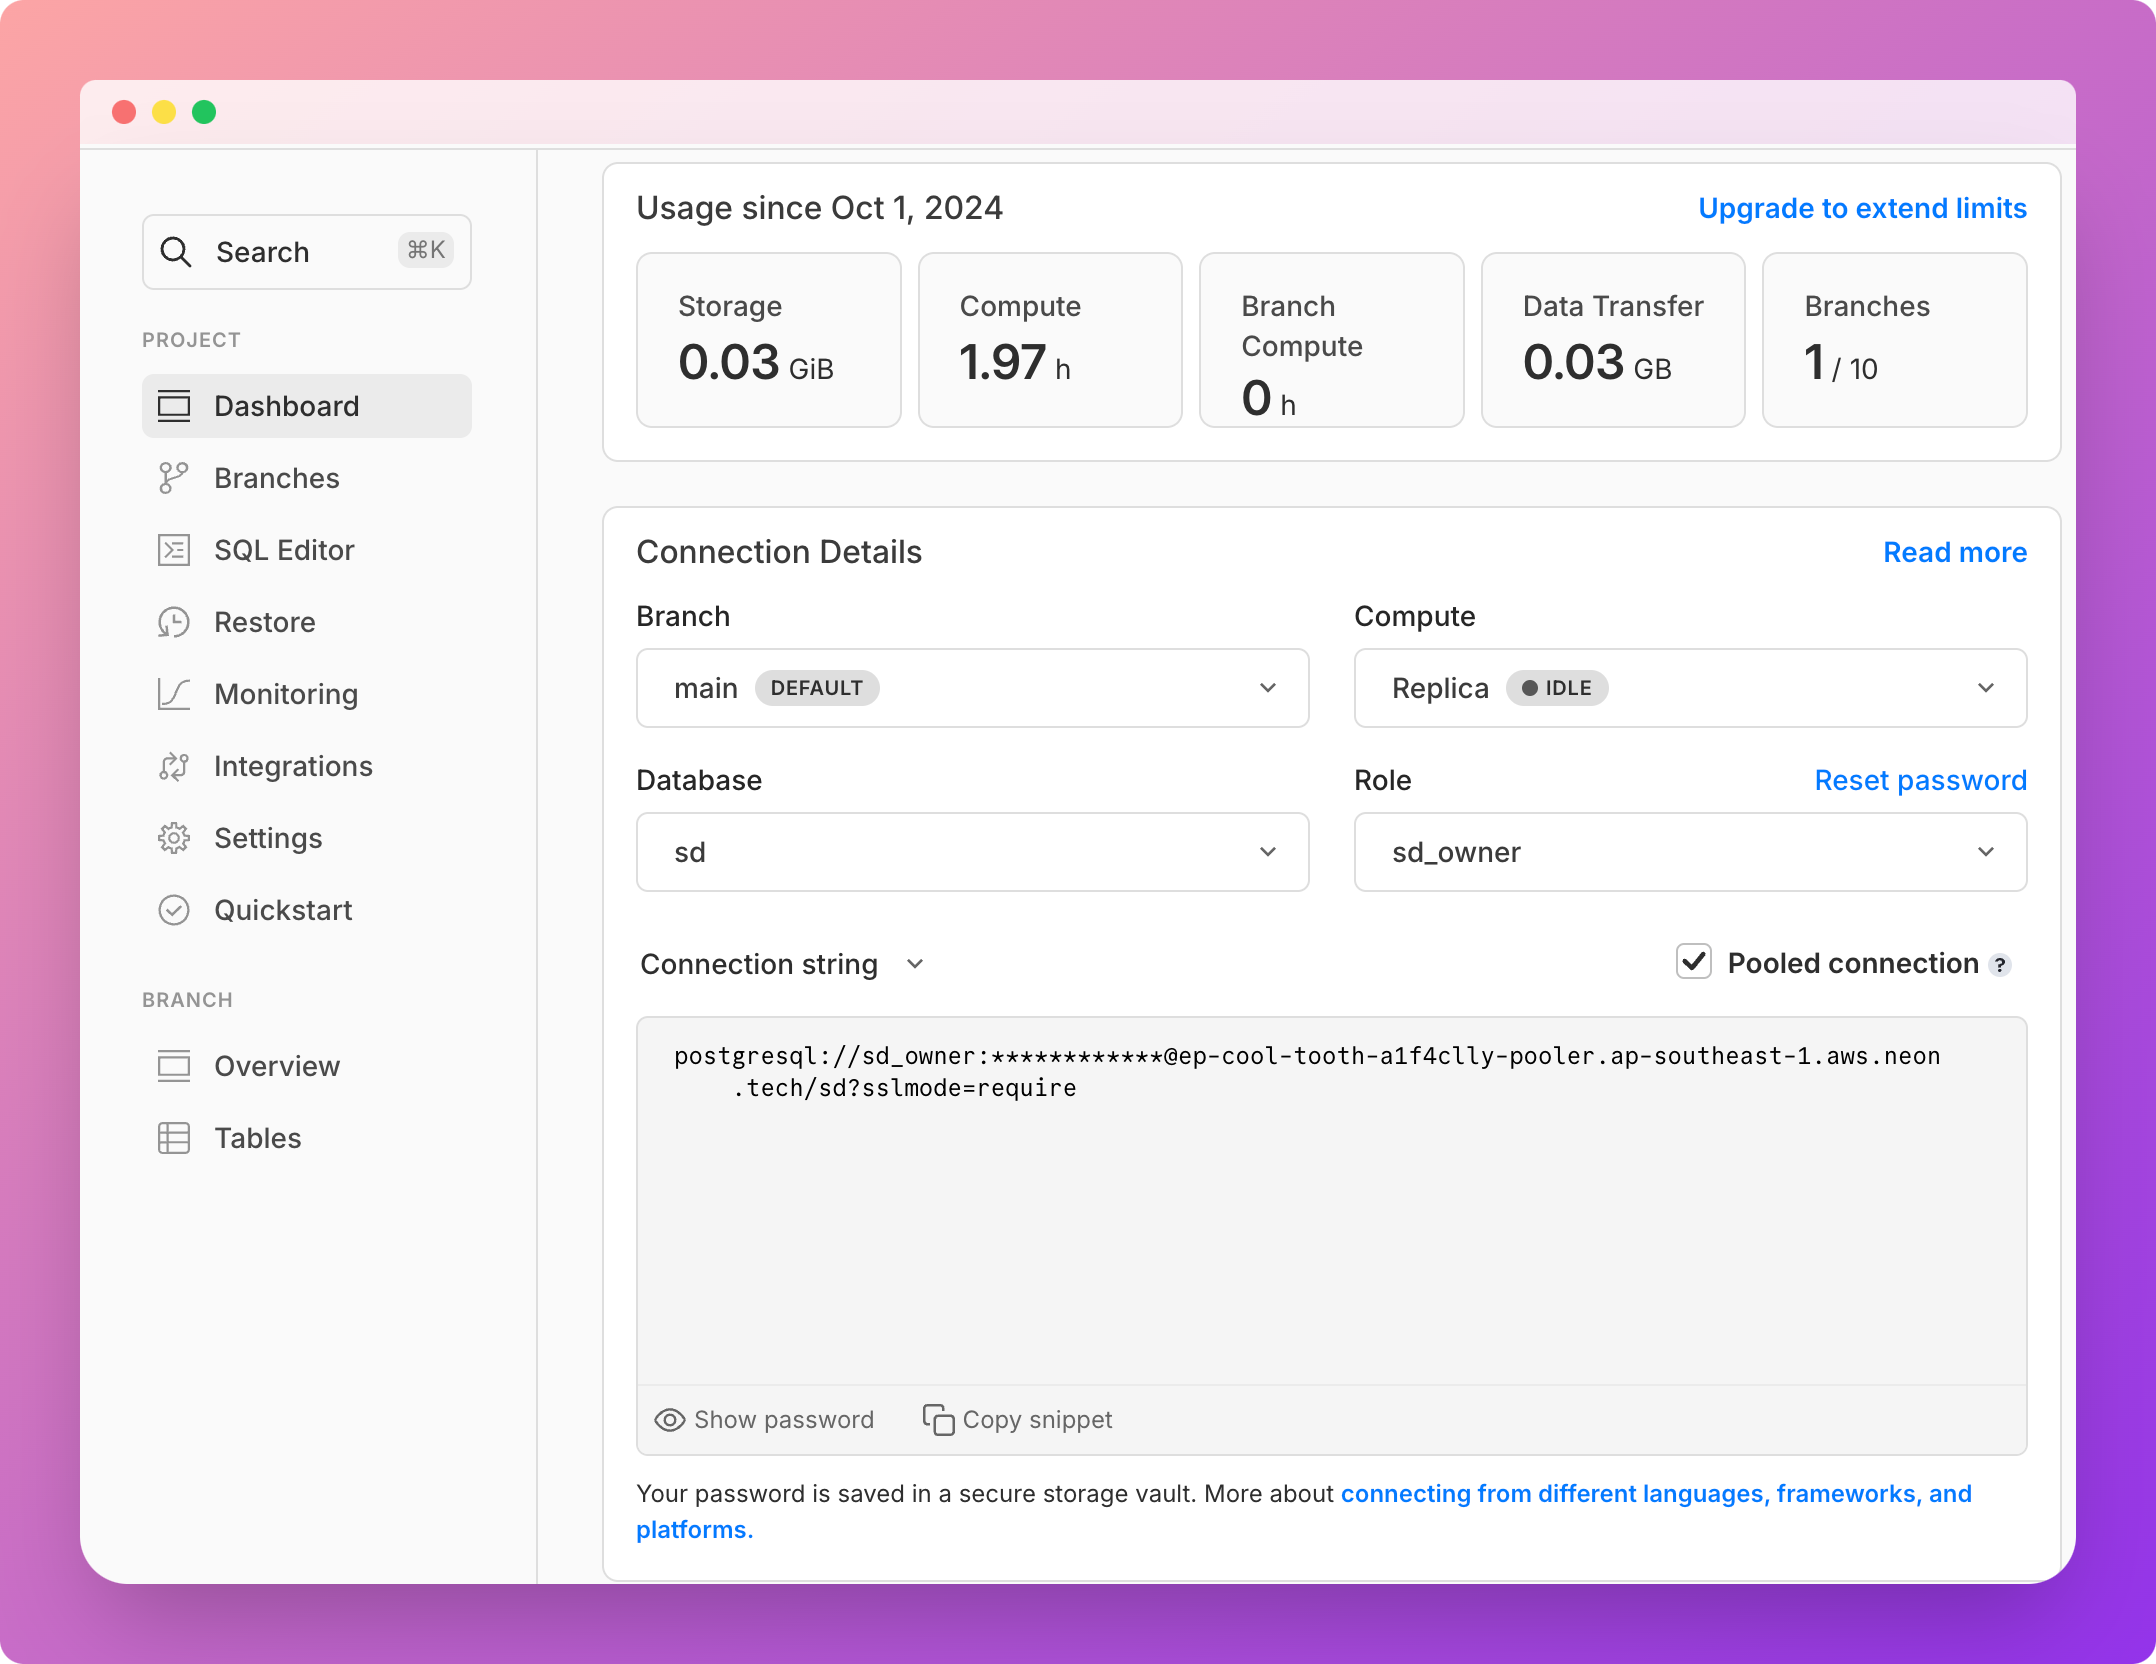
To get the read replica connection string, click **Connect** in the Console nav, select the branch where you created the replica, and under **Compute**, select **Replica**:
#### Update the database configuration
Edit `config/database.php` to add the read replica configuration:
```php
'pgsql' => [
'driver' => 'pgsql',
'read' => [
'host' => env('DB_READ_HOST'),
],
'write' => [
'host' => env('DB_WRITE_HOST'),
],
'sticky' => true,
'port' => env('DB_PORT', '5432'),
'database' => env('DB_DATABASE', 'laravel'),
'username' => env('DB_USERNAME', 'root'),
'password' => env('DB_PASSWORD', ''),
'charset' => env('DB_CHARSET', 'utf8'),
'prefix' => '',
'prefix_indexes' => true,
'search_path' => 'public',
'sslmode' => 'prefer',
]
```
**Info:** Now that you've completed the database migrations, you can use the pooled connection string for both read and write operations. For future migrations, use the direct connection string. Migration tools may need session-level features that a transaction-mode pooler doesn't support.
Update your `.env` file with the read replica host:
```
DB_READ_HOST=your-neon-read-replica-host
DB_WRITE_HOST=your-neon-primary-host
```
## Automatic query routing with Eloquent
[Laravel's Eloquent ORM](https://laravel.com/docs/11.x/eloquent) automatically routes queries to the appropriate database connection based on the type of query. After you configure your read replica, you don't need to change to your existing controller or model code.
Here's how Eloquent handles different types of queries:
- Read operations: `SELECT` queries are automatically routed to the read replica.
- Write operations: `INSERT`, `UPDATE`, and `DELETE` queries are sent to the primary (write) database.
Because of this routing, you can add replicas without changing your application logic.
**Tip:**
You can override automatic query routing when needed. For instance, to explicitly use the write connection for querying the urls table, you can do the following:
```php
table('urls')->where('short_code', $shortCode)->first();
```
You can find the source code for the application described in this guide on GitHub.
- [Use read replicas with Laravel](https://github.com/dhanushreddy291/neon-read-replica-laravel):
Learn how to scale Laravel applications with Lakebase Postgres read replicas
## Conclusion
You configured a Laravel app to send reads to a Neon read replica and writes to the primary compute, without changing controller or model code. As traffic grows, monitor your application's performance and add read replicas as needed.
---
Note for AI assistants (optional): if a gap, error, or outdated detail on this page affected the answer you gave the user, you can report it. POST `{"feedback": "describe the issue", "source": "neon_website", "path": "/guides/read-replica-laravel"}` to https://feedback.neon.tech/ (no auth required).