


We just launched Neon Auth and of course the immediate follow-up task I had was “let’s teach my AI tools to use it for me”. So we’ve been wiring Neon Auth into our MCP so you can open Cursor, Claude, or your IDE or choice and let the AI build a backend for you.
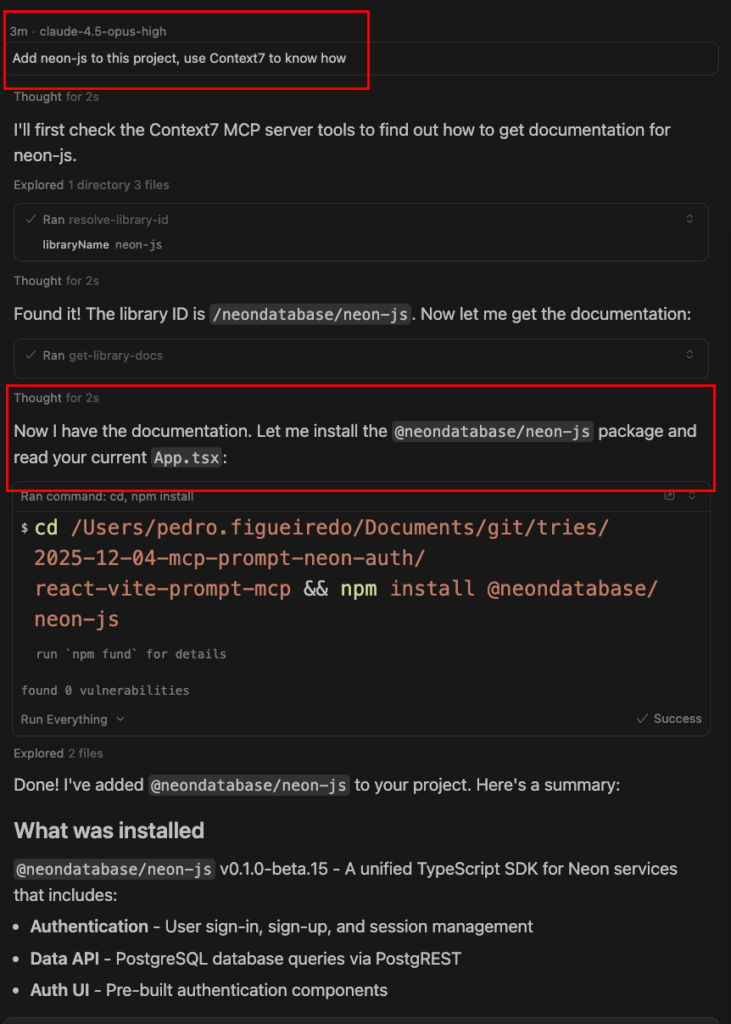
Here’s a short demo of the workflow in action. I start from an existing Vite + React + TypeScript app, ask the AI to add Neon Auth, and let it scaffold everything inside the editor. There’s very little manual work involved:
This workflow doesn’t require to start from a template or a greenfield project, you can add use it with existing apps. As we’re about to see, under the hood the AI is guided by explicit rules instead of vague instructions, so it can integrate auth into an existing file structure and place new files exactly where they belong. This is what makes the workflow practical beyond demos. You’re incrementally upgrading a real codebase with a production-ready auth setup.
How this works
In this workflow, the AI is following a set rules we’ve been building to make AI-assisted development with Neon reliable instead of letting the AI do magical-thinking:
- Neon Auth guidelines in ai-rules, which define the correct setup patterns
- MCP prompt templates, which let AI IDEs apply those rules consistently inside your project
- AI skills like the neon-auth Claude skill, which turn those rules into executable workflows, and external knowledge sources like Context7, which give agents up-to-date SDK documentation when needed
Let’s walk through them from the bottom up.
ai-rules for Neon Auth
The neon-auth.mdc in the ai-rules repo is the source of truth that every AI tool reads from. It spells out every pattern you’d have to remember yourself, e.g.
- Which package to use (
@neondatabase/authvs@neondatabase/neon-js), depending on whether you only need authentication or want a unified client for auth and database queries. - How to set up Auth in Next.js, React SPA, and Node.js
- The correct environment variables for each framework
- The UI components and the right way to import CSS (Tailwind vs no Tailwind)
- Critical rules like importing
BetterAuthReactAdapterfrom the/react/adapterssubpath and always calling it as a function - Common mistakes developers run into and potential fixes
MCP templates for Neon Auth (and neon-js)
The next layer is MCP prompt templates, which make those rules usable inside AI-powered IDEs.
These templates are intentionally lightweight, they don’t re-explain how Neon Auth works. Instead, they do two important things:
They give AI IDEs a structured way to interact with your project
Editors need more than “here’s how auth works.” They need instructions for how to
- inspect your file system
- detect your framework
- route to the right setup guide
- confirm each step worked
- escalate to troubleshooting when something fails
They always point to the latest rules
Instead of duplicating documentation into prompts (which would drift immediately), the templates pull everything from the ai-rules repo via raw GitHub URLs. That means whenever we update the Neon Auth guides, every IDE using these templates gets the update automatically.
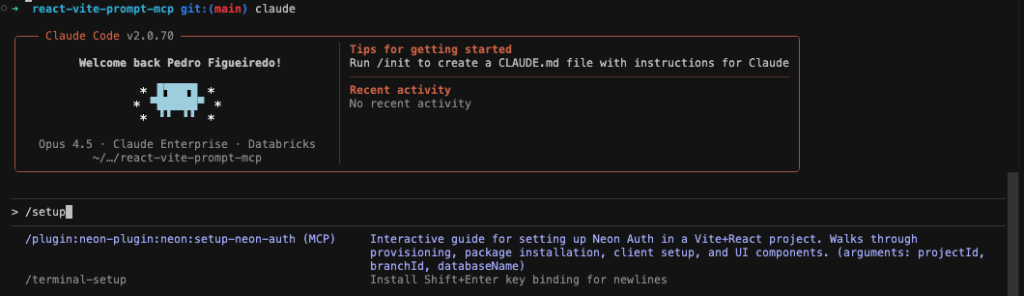
For Claude, there’s a skill
If you’re using Claude, this all comes together today is the neon-auth Claude skill.
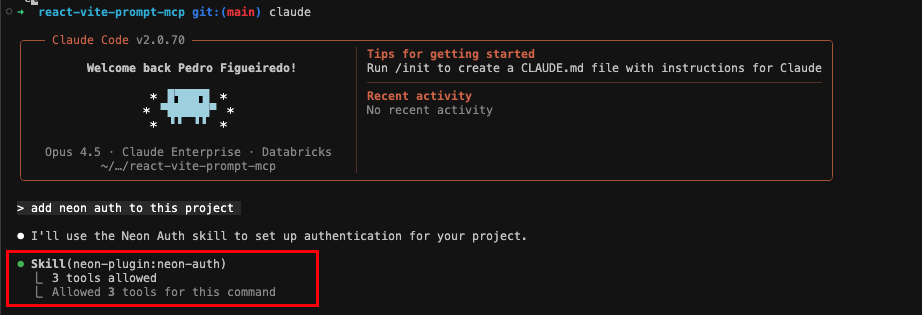
If ai-rules is the knowledge, the skill is the workflow:
- It detects whether you’re in a Next.js, Vite/React, or Node.js app
- Figures out which package manager you’re using
- Installs the correct package
- Creates files in the right places
- Enforces all conventions from ai-rules
Using Context7 for up-to-date SDK knowledge
In addition to Neon’s own ai-rules, many agents rely on Context7, a repository of LLM-friendly documentation for popular libraries. In the demo, perhaps you noticed how the AI knew what neon-js was in the first place via Context7. This is especially useful for SDKs like neon-js that evolve quickly and are used across many projects.
How to start building
You can try this workflow today from any AI-enabled editor that supports MCP. Here’s the high-level flow:
- Open an existing app (or an empty repo) in your editor
- Make the Neon Auth AI rules available to the agent
- Enable Neon Auth for that project
- Add the Auth URL to your environment variables
- From there, you can give a prompt like, “add Neon Auth to this app and set up sign-in and sign-up”
- Start your dev server and try the flow
If you have any questions, ask us on Discord!