---
title: Anonymize data with Neosync
subtitle: Learn how to anonymize sensitive data in Neon with Neosync
enableTableOfContents: true
updatedOn: '2025-09-09T10:09:25.189Z'
---
Neosync was recently acquired and is no longer available. The instructions in this guide are deprecated and will be removed in a future update.
[Neosync](https://www.neosync.dev/) is an open-source synthetic data orchestration platform that can create anonymized data and sync it across all of your database environments for better security, privacy, and development.
In this guide, we'll show you how to anonymize sensitive data in a Neon database branch for testing and rapid development using Neosync.
## Prerequisites
To complete the steps in this guide, you require the following:
- A Neon account and project. If you do not have those, see [Sign up](/docs/get-started/signing-up#step-1-sign-up).
- A source database in Neon. This guide uses a source database named `neon-neosync` that resides on the `main` branch of the Neon project. The database has a `users` table populated with 1000 rows of data. To set the same table, see [Generate synthetic data with Neosync](/docs/guides/neosync-generate).
- A [Neosync](https://www.neosync.dev/) account.
## Neon setup
Anonymizing data requires source and destination databases. This section describes the source database and how to set up a destination database branch in Neon where you will sync anonymized data using Neosync.
A Neon branch is an isolated copy of your database environment that you can use for development and testing.
### The source database
This guide assumes you already have a source database in Neon. The source database referenced in this guide has a `users` table, created in the `public` schema. The `users` table has 1000 rows and is defined as shown below:
```sql
CREATE TABLE public.users (
id UUID PRIMARY KEY,
first_name VARCHAR(255) NOT NULL,
last_name VARCHAR(255) NOT NULL,
email VARCHAR(255) NOT NULL,
age INTEGER NOT NULL
);
```
If you do not have a source database and would like to create one with the same table and data, see [Generate synthetic data with Neosync](/docs/guides/neosync-generate).
### Create a branch for the destination database
To create a branch for the destination database, which we'll name `neosync-destination`, perform the following steps:
1. Navigate to the [Neon Console](https://console.neon.tech).
1. Select your project.
1. Select **Branches** from the sidebar.
1. Click **New Branch**.
1. Enter a name for the branch (`neosync-destination`), and select your `main` branch as the parent.
1. Click **Create new branch**. A modal opens with the connection details for your new branch. Copy the connection string. You'll need it to set up Neosync.
After completing the steps above, you will have a destination database branch, which is an exact copy of the parent branch. It has the same databases, tables, and data as the parent branch. With Neosync, we'll truncate the sensitive data on the destination database branch and replace it with anonymized data. The data in your `main` branch will not be affected.
## Neosync setup
The Neosync setup involves setting up a connection to the destination database and creating a data synchronization job to create anonymized data.
### Create a destination database connection
1. Navigate to [Neosync](https://www.neosync.dev/) and log in. Go to **Connections** > **New Connection** and click on **Neon**.
2. Enter a unique name for the connection in the **Connection Name** field. We'll give the connection the same name as the destination branch: `neosync-destination`
3. Paste the Neon database connection string for the branch in the **Connection URL** field and click **Test Connection** to verify that the connection works.
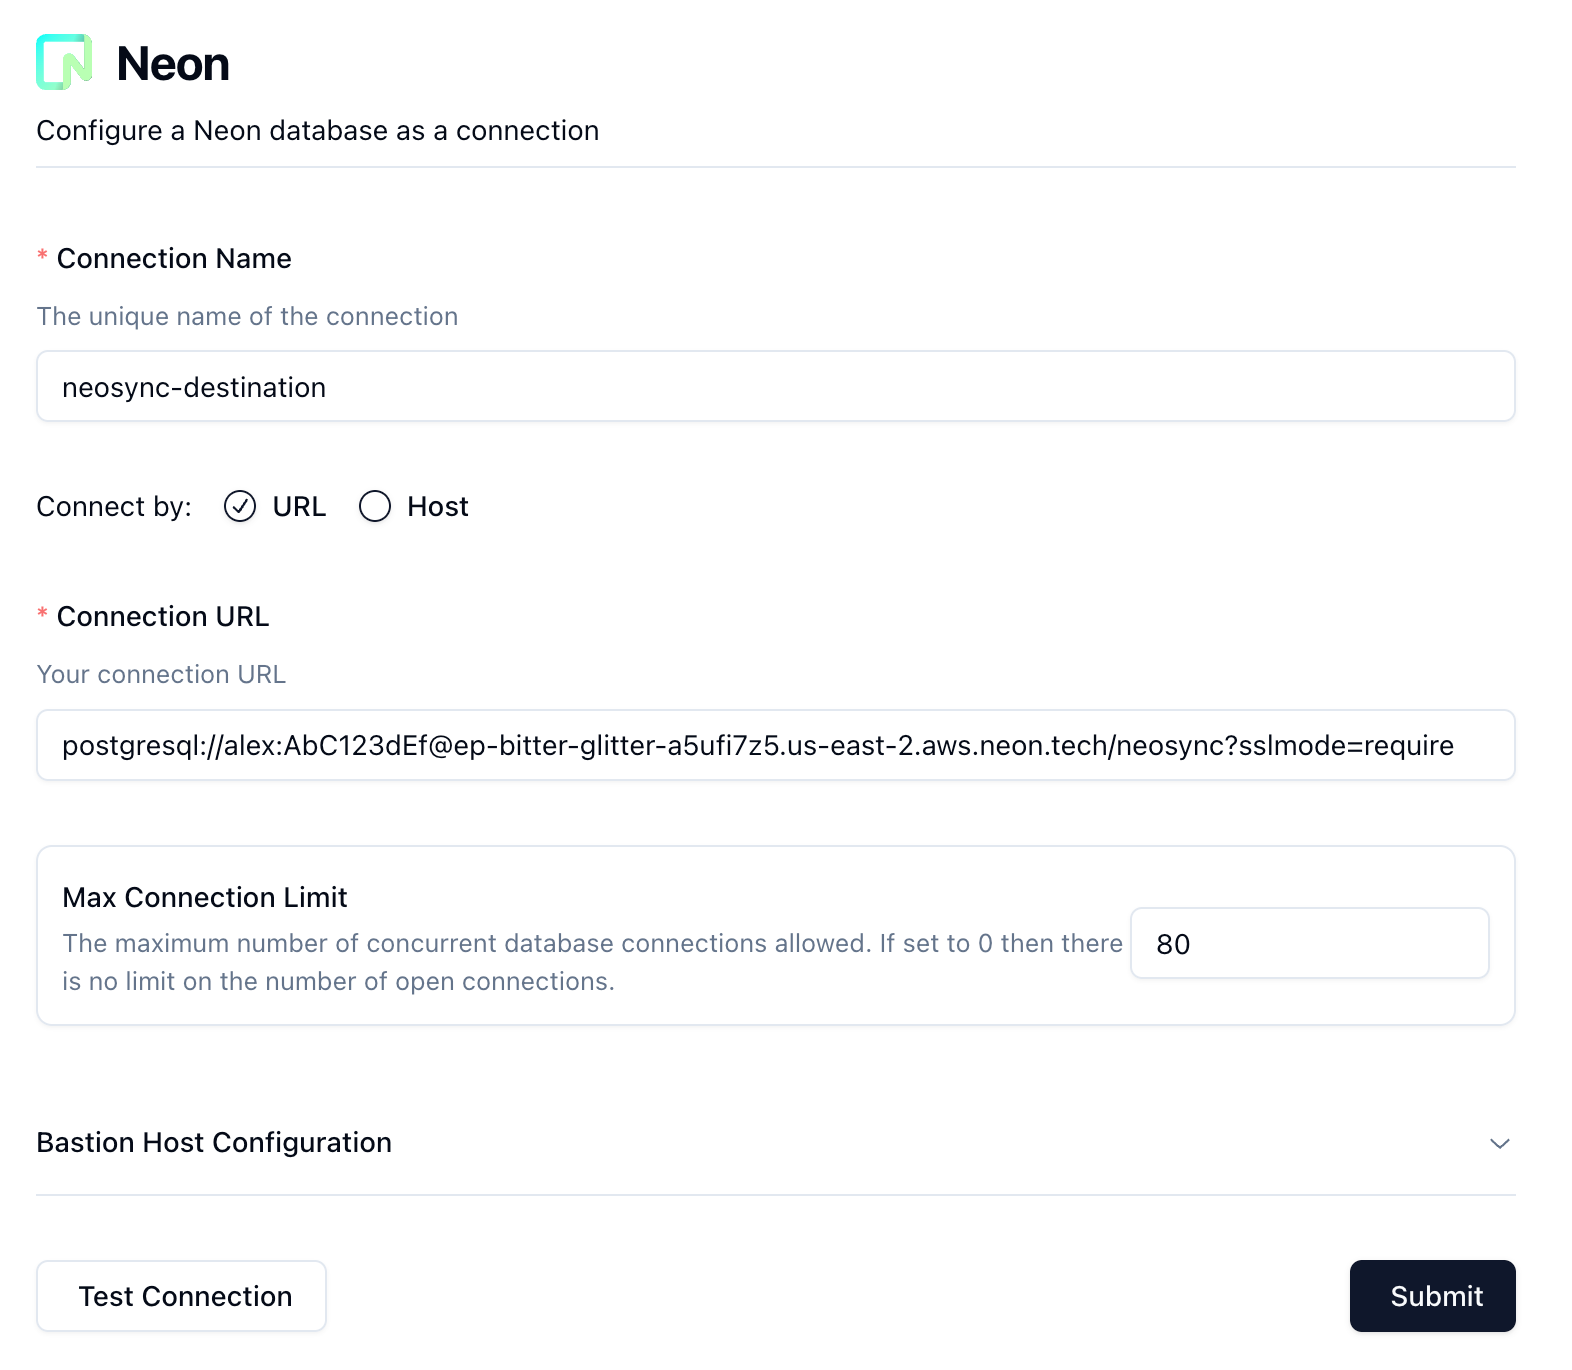
4. Click **Submit** to save the connection configuration.
### Create a data synchronization job
To generate anonymized data, we need to create a **Job** in Neosync.
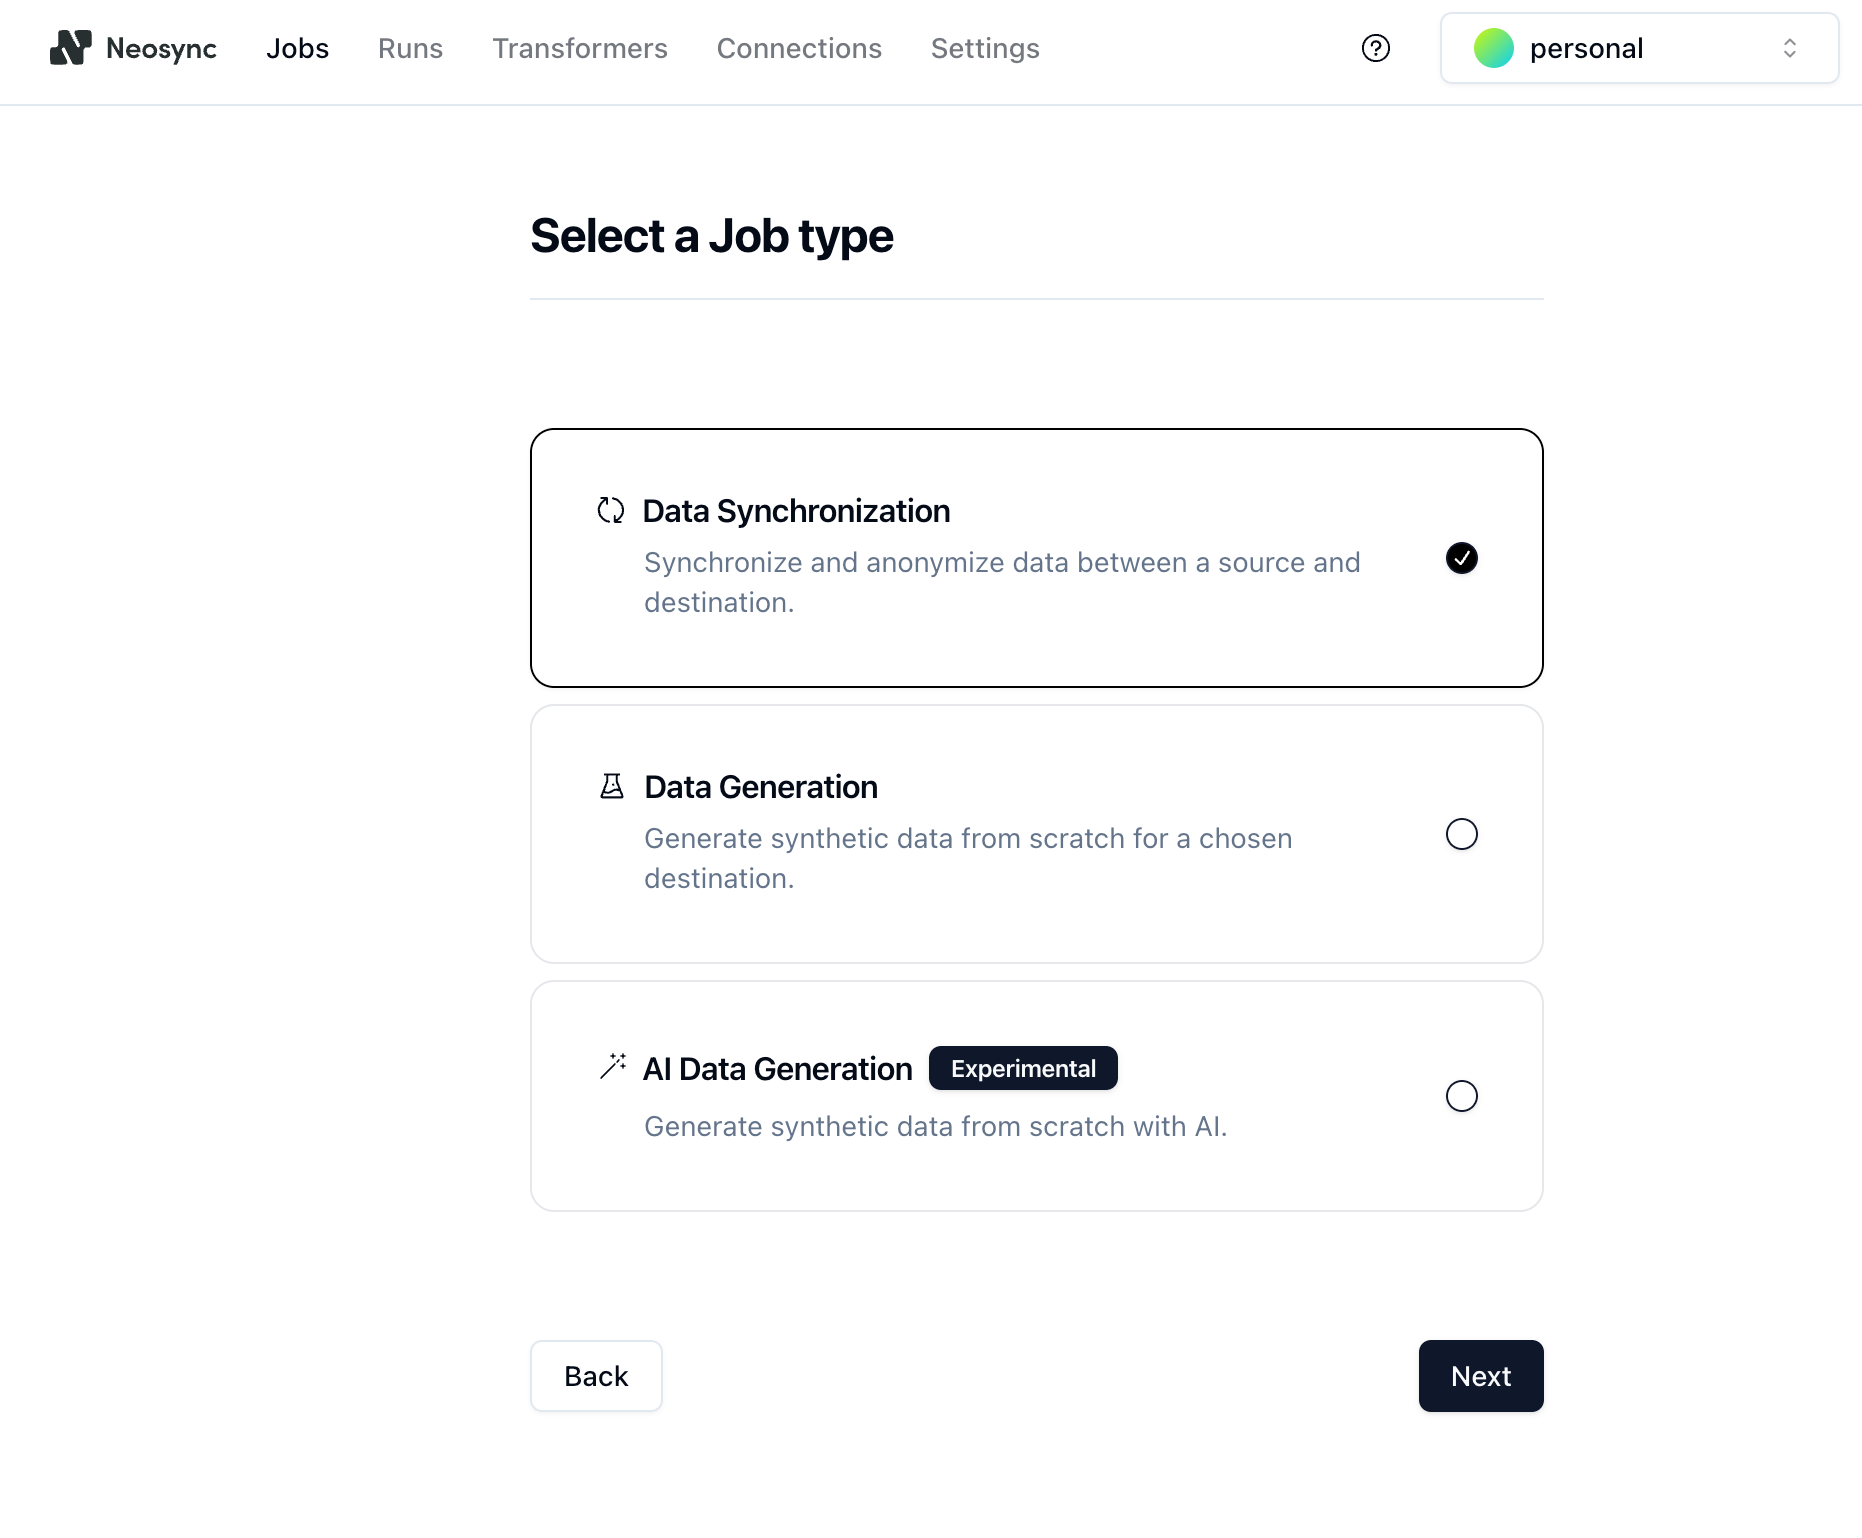
1. In Neonsync, click on **Jobs** and then click **New Job**. You are presented with a few job types. Since you are anonymizing existing data, select the **Data Synchronization** job type and click **Next**.
2. Give the job a name (e.g. `anonymize-user-data`) and set **Initiate Job Run** to **Yes**.
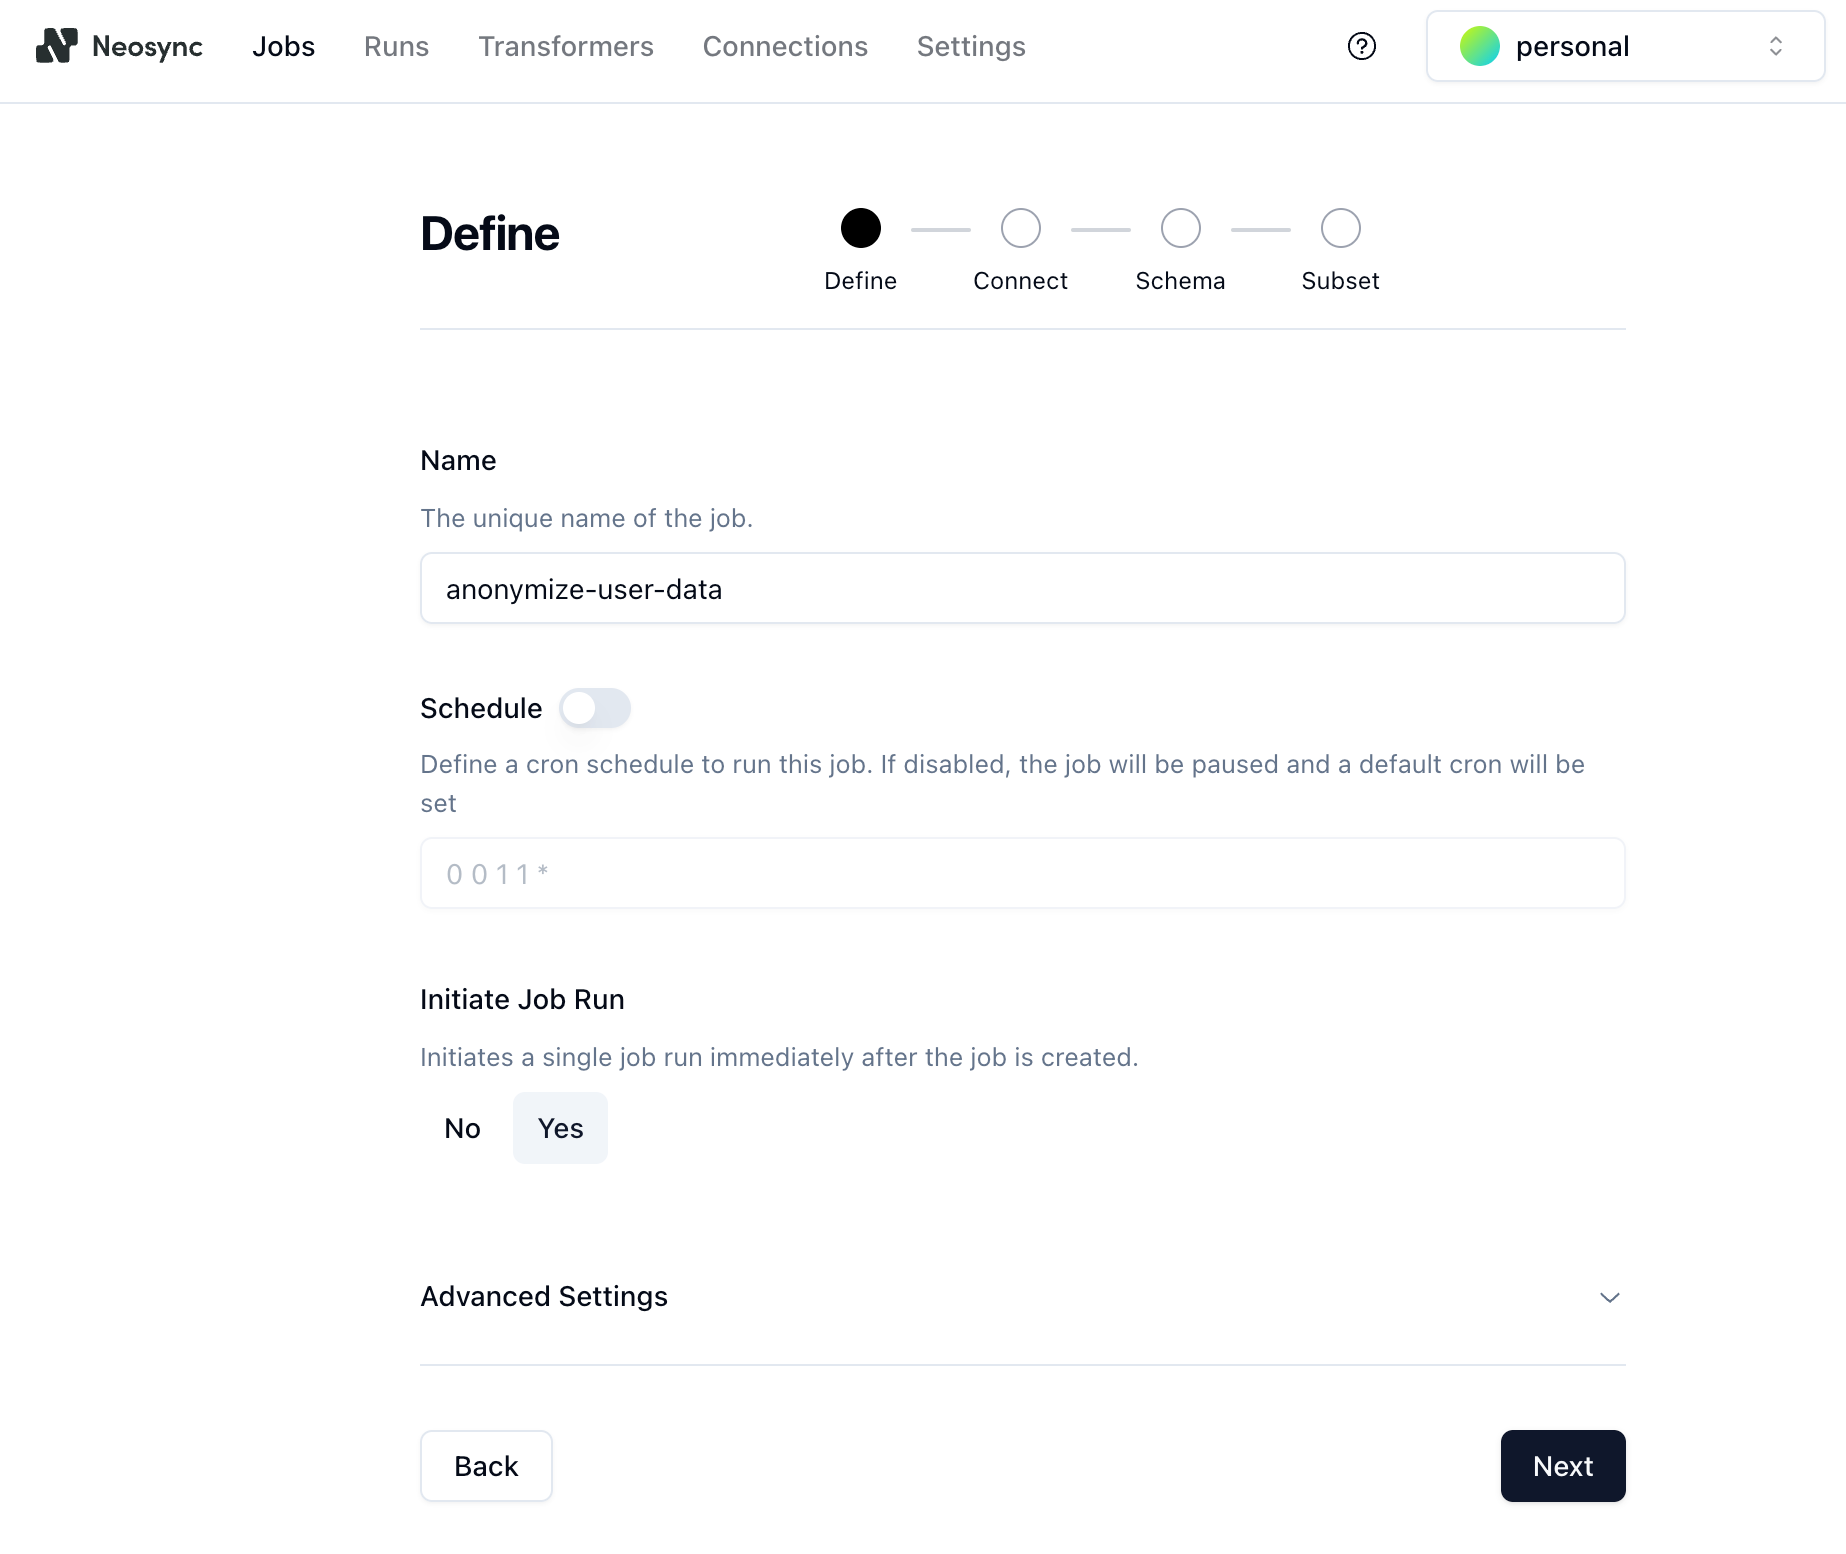
3. Click **Next** to move to the **Connect** page.
- Select the location of the source data set from the dropdown. In this example, the location is the `neon-neosync` connection to the database on your `main` branch.
- Select the location of the destination database where the data should be synced. In this example, the destination location is the `neosync-destination` connection to the database on your destination branch.
- We'll also enable the **Truncate Before Insert** option to truncate the table before inserting data. This will replace the data that was copied when you created the destination branch and refresh the data each time you run the job.
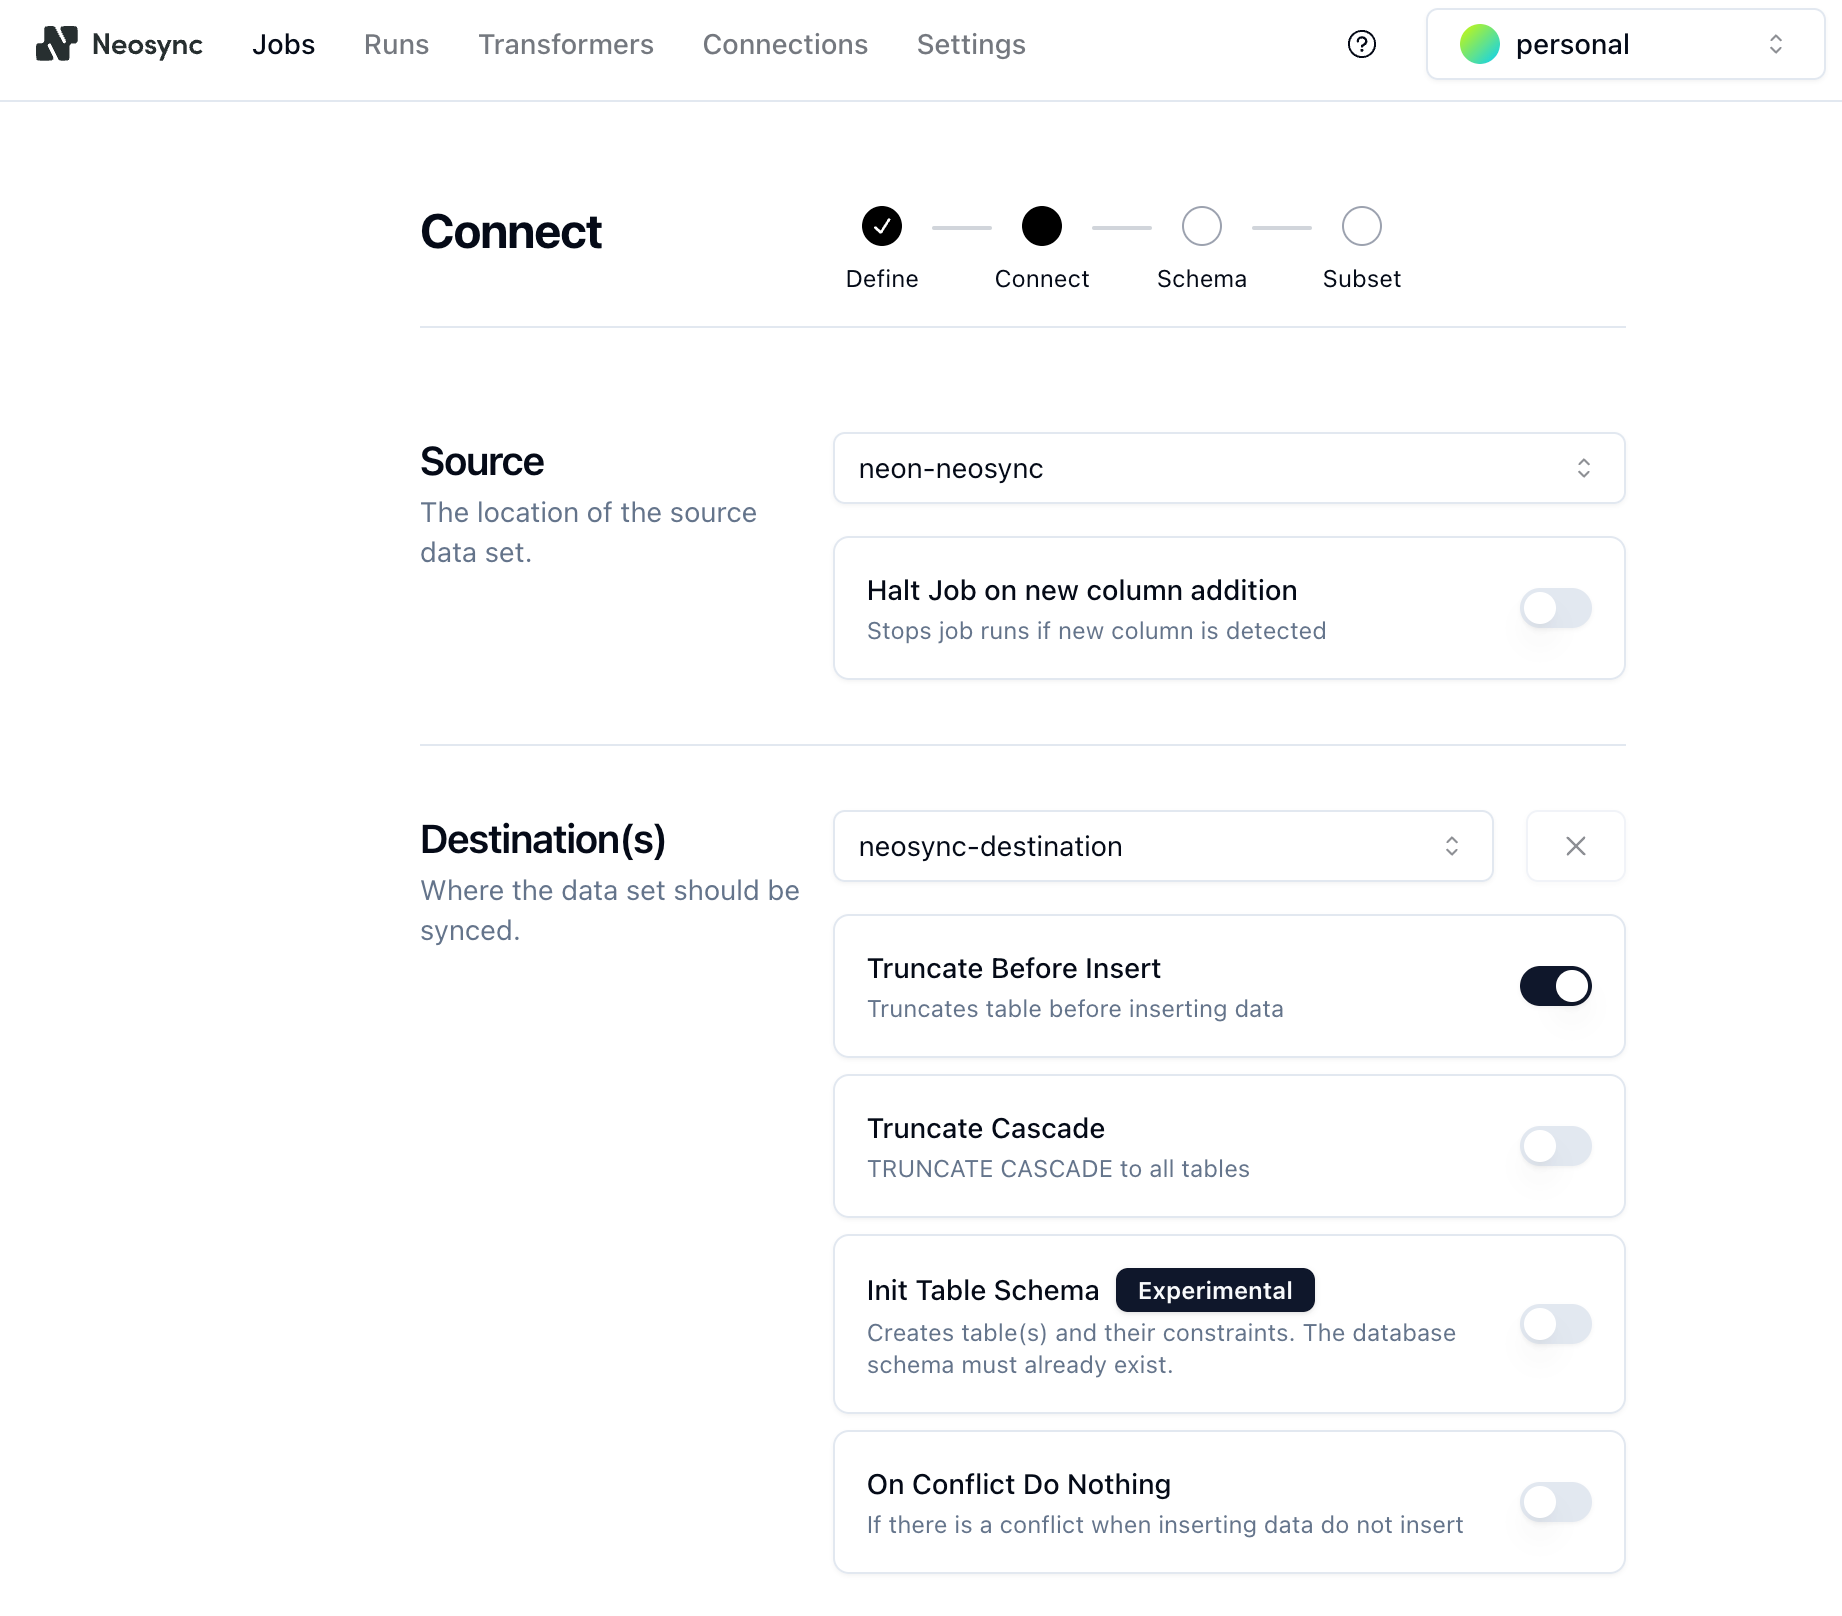
Click **Next**.
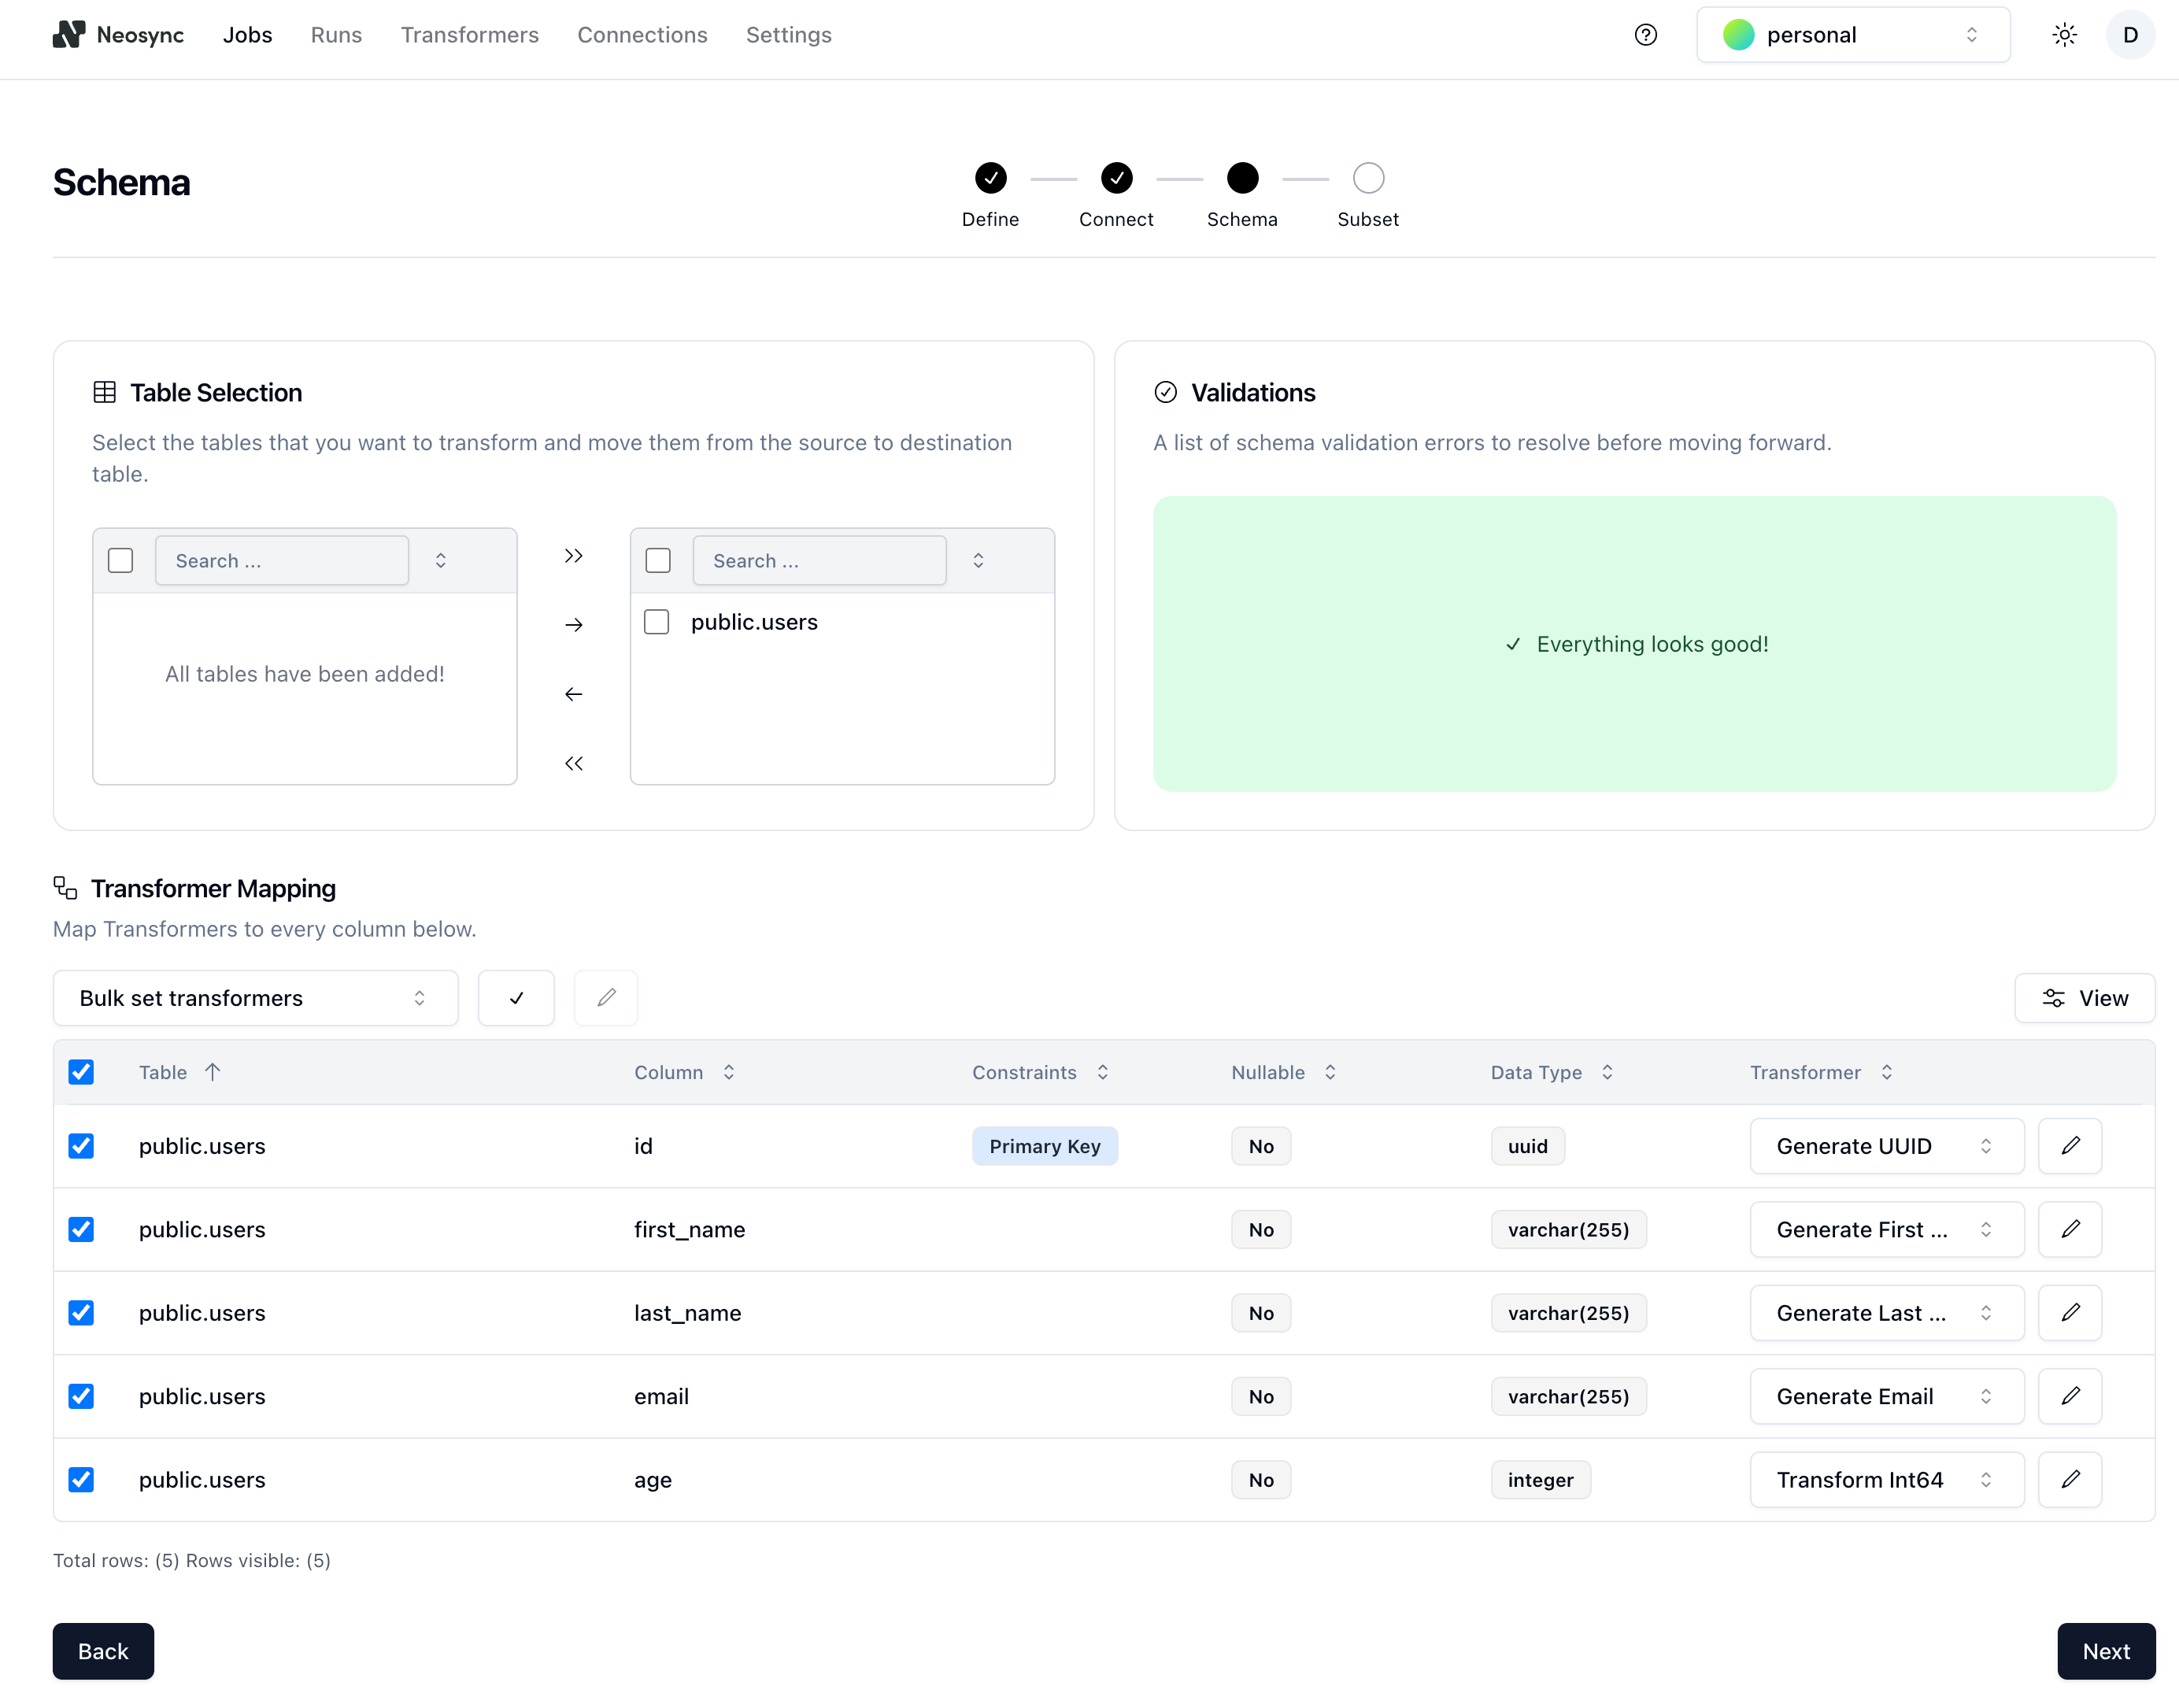
4. On the **Schema** page:
- Under **Table Selection**, select the schema and table (`public.users` in this example) and move it from the source to the destination table.
- Under **Transformer Mapping**, select all of the columns and choose a **Transfomer** to define the type of data you want to generate for each column. For the `age` column, we used the `Generate Random Int64` to randomly generate ages between 18 and 40. You can configure the generator by clicking on the edit icon next to the transformer and setting min and max values.
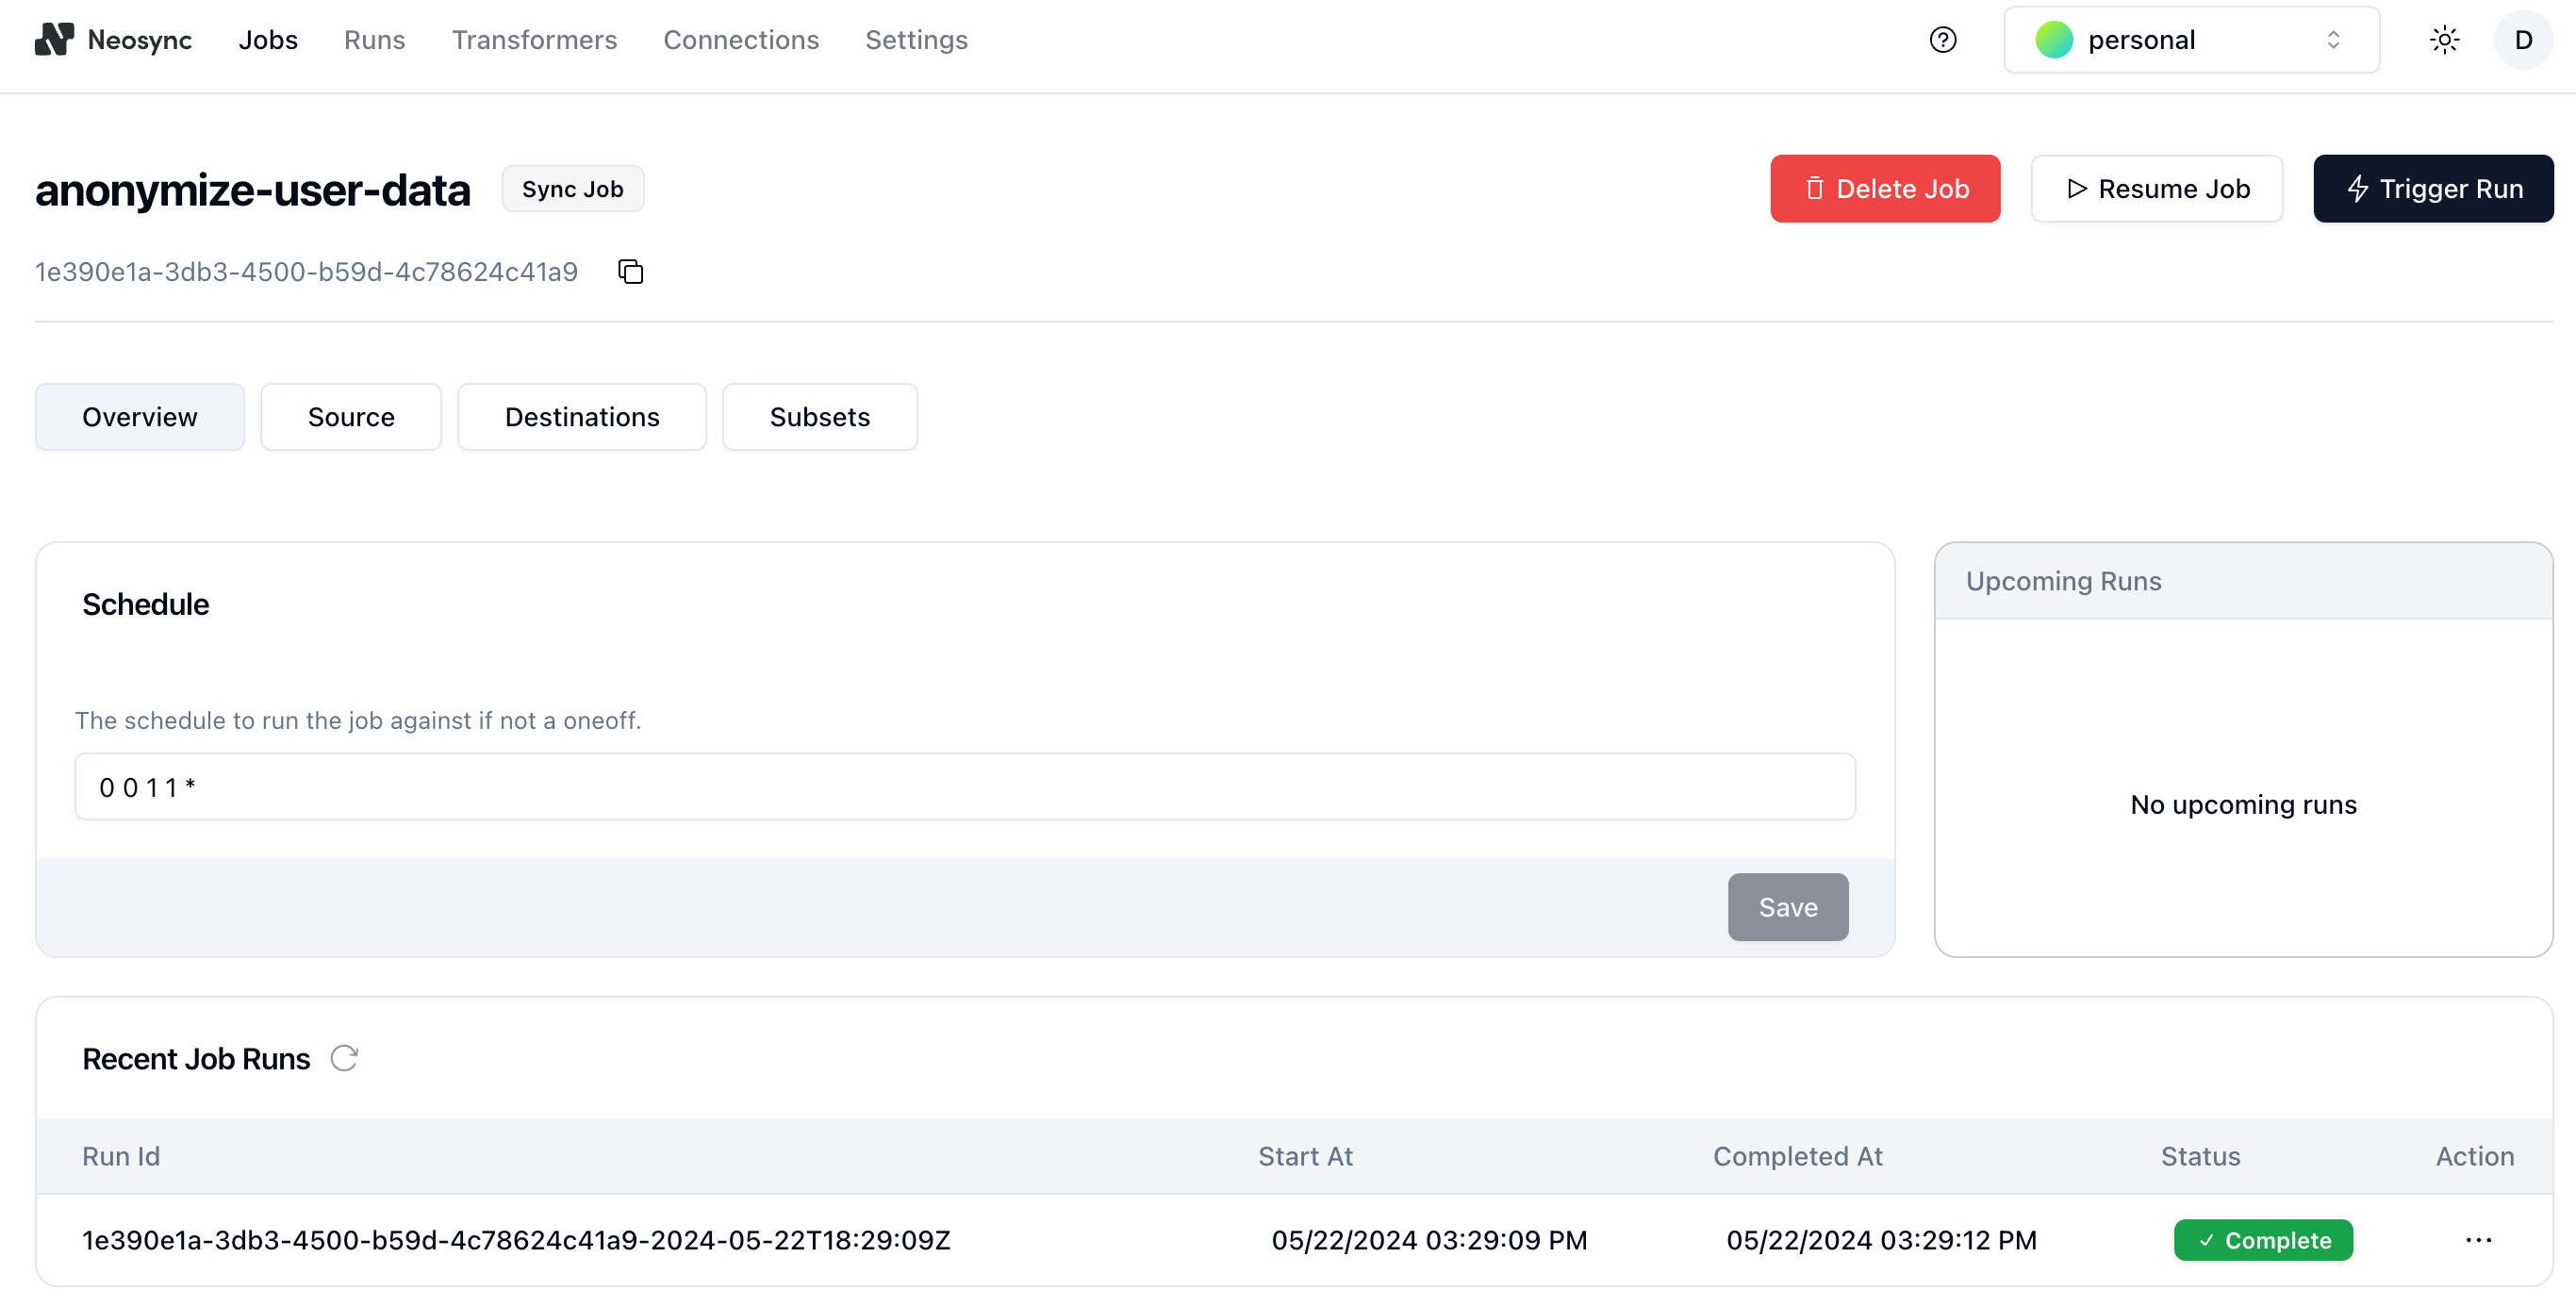
5. Click **Next** to go to the **Subset** page. The subset feature allows you to automatically subset data for child tables by defining SQL filters. Since we're only anonymizing data for a single table in this guide, we'll just click **Save** to create the job and start the first run.
To learn more about Neosync's subset feature, see [Subsetting with referential integrity](https://www.neosync.dev/blog/subset-referential-integrity).
You can see that the job ran successfully, and in just a few seconds, it copied, anonymized, and moved data from your source database to your destination database in Neon.
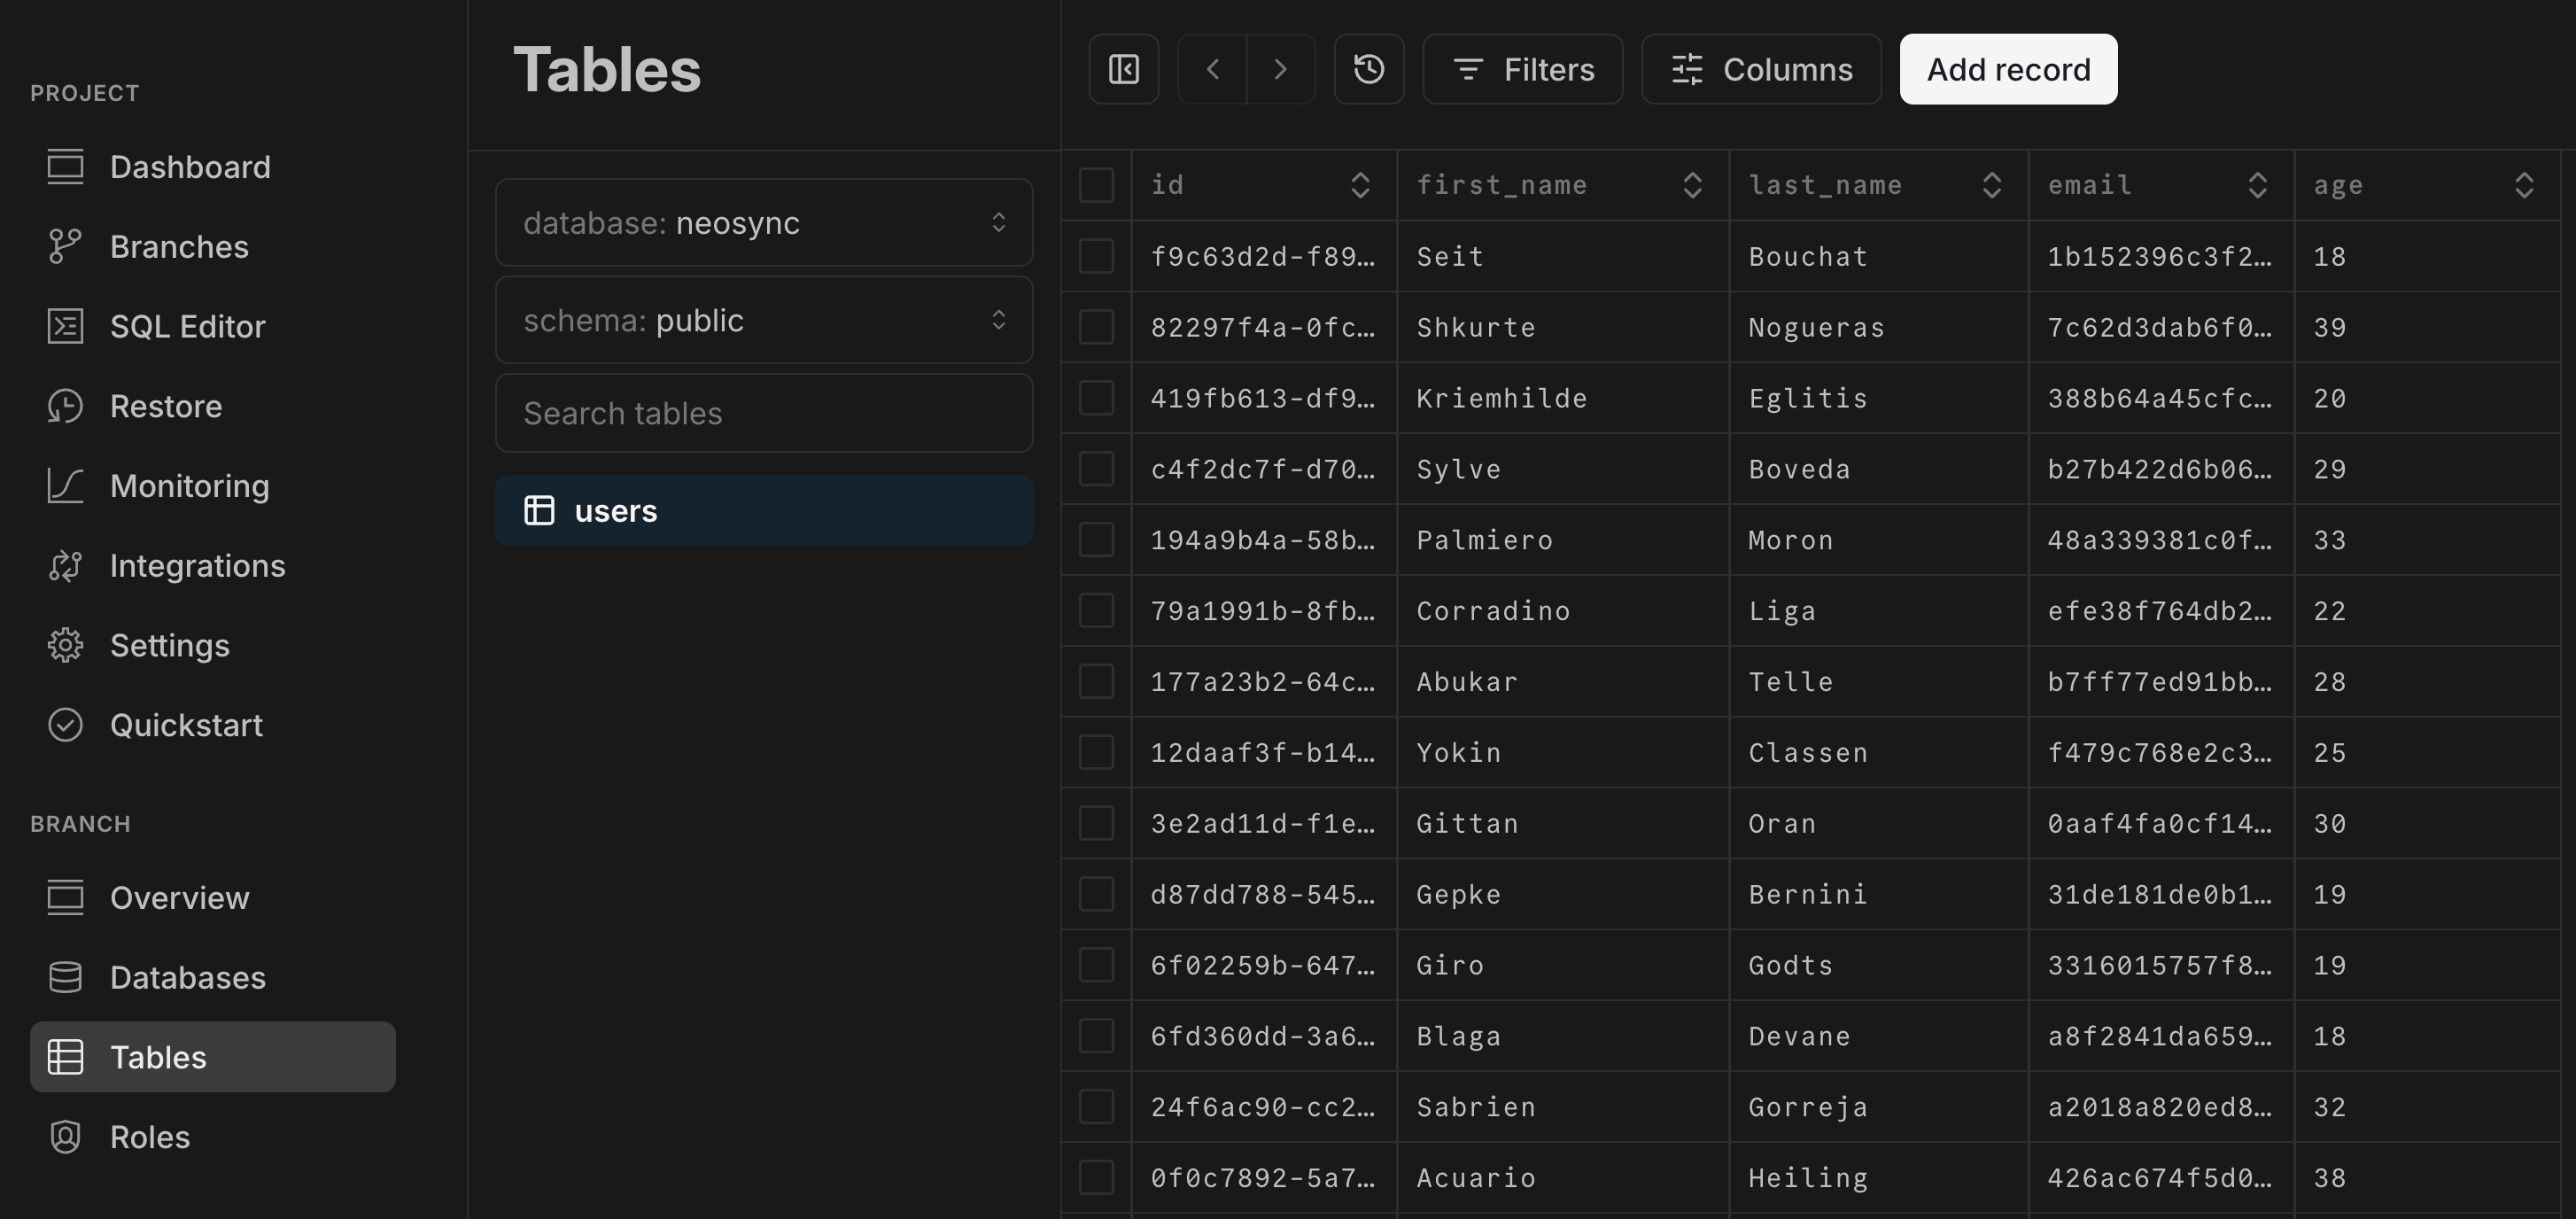
6. You can verify that the anonymized data was generated in your destination branch by navigating to the Neon Console, selecting **Tables** from the sidebar, and selecting the `neosync-destination` branch from the breadcrumb selector at the top of the page. Your anaonymized data should be visible in `public.users` table.
## Conclusion
In this guide, we stepped through how to sync and anonymize sensitive data between source and destination databases in Neon using Neosync. We showed how to create a Neon branch and use a Neosync job to anonymize the data on the branch. Alternatively, you could have created another database in Neon as your destination, but creating a branch simplifies the process by removing the requirement to create a schema in the destination database — Neon's branches copy parent's schema and data for you.
Neosync supports any Postgres database. You can also sync and anonymize data from Neon to RDS or from RDS to Neon, for example.
This was a small test with only 1000 rows of data, but you can follow the same procedure to branch and anonymize millions of rows of data, and Neosync can manage any referential integrity constraints for you.
## Resources
- [Neosync](https://www.neosync.dev/)
- [Neosync Quickstart](https://docs.neosync.dev/quickstart)
- [Anonymization in Neosync](https://docs.neosync.dev/core-features#anonymization)
- [Synthetic data generation](https://docs.neosync.dev/core-features#synthetic-data-generation)
- [How to Anonymize Sensitive Data in Neon](https://www.neosync.dev/blog/neosync-neon-sync-job)
- [How to use Synthetic Data to catch more bugs with Neosync](/blog/how-to-use-synthetic-data-to-catch-more-bugs-with-neosync)
- [How to seed your Neon DB with Synthetic Data](https://www.neosync.dev/blog/neosync-neon-data-gen-job)